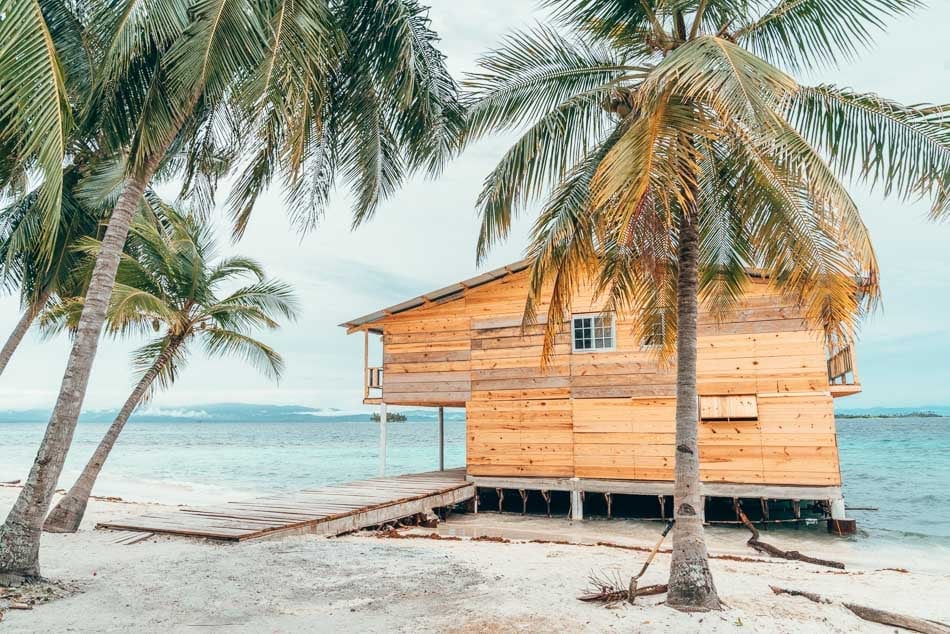
The Ultimate Guide to Visiting the San Blas Islands, Panama (Guna Yala)

Everything you need to know to plan a trip to the San Blas Islands, Panama (aka Guna Yala)!

Things are changing rapidly – please double check what’s open before your trip and follow all local guidelines to keep yourself and others safe! Also, ads are how we pay our bills and keep our blog free for you to enjoy. We also use affiliate links; if you make a purchase through them, we may receive a small commission at no cost to you.

Aquamarine Caribbean water. White sugar sand beaches. Swaying palm trees. The San Blas Islands are the visual embodiment of paradise. The islands literally look like a screensaver: for years, many Microsoft users have been staring longingly a picture of San Blas as their desktop background!

The San Blas Islands are one of the most beautiful places we’ve ever visited, but also one of the most confusing. During our 3-day trip, were never really sure what we were doing or where we were, and between our stunted Spanish and our host’s Dulegaya, communication was difficult.

But our biggest challenge was just letting go of our need for control: honestly, all we had to do was show up, go where we were directed to, and enjoy ourselves! So why was that so hard for us? Answer: because we are anxiety-prone control freaks, of course.

We spent the first day of our trip confused, stressed out, and unable to relax. But by day 3, we weren’t ready to leave! We’d found our tranquilo and adapted to a life of being fully present and totally laid back. For a day or two, anyway.

If you’re an anxiety case /control freaks like we are, the lack of knowing things can be stressful, and it’s not super easy to find information about visiting the San Blas islands online (we’ve tried). So we created this San Blas travel guide to help ease your mind and tell you everything you need to know about planning a trip to the San Blas Islands, Panama! (For starters, that’s not their real name, and they’re not really in Panama. Don’t worry, we’ll explain.)

2021 Travel Tip: Fully vaccinated and feeling ready to travel again? YAY! Us too! But things are changing rapidly right now, so as soon as you buy your tickets, make sure to buy travel insurance in case you need to unexpectedly delay, cancel, or extend your trip. We recommend World Nomads and SafetyWing. For more details, head to our travel insurance guide!

Psst: Planning more adventures? We have a few posts on nearby destinations:

READ THIS POST

A Traveler’s Guide to Transportation in Colombia

Couple on a dock in San Blas, Panama.
The San Blas Islands are one of the most idyllic, beautiful places we’ve ever been!

COVID Information for San Blas, Panama

The San Blas Islands are re-opening to foreign tourists as of August 14, 2021. Here’s what you need to know:

  • Anyone entering Guna Yala must present a negative RAPID ANTIGENIC Covid-19 test done within 48 hours, even if you are fully vaccinated. You need the same test to enter Panama (details here) so you may want to book your trip to San Blas the day after you arrive. Otherwise, you’ll want to get this done in a large city before you leave (Panama City or Cartagena).
  • You must reserve day trips or accommodations in advance (some sources say 24 hours, some say a week). Without a reservation it is not possible to enter Guna Yala.
  • Your temperature will be measured in at least 3 control points: before entering the car to the port, on the boat, and on the Island.
  • You must wear a mask in the car and on the boat.
  • The number of islands and places visitors are currently able to visit is limited. You may only be able to visit a single island. Keep that in mind when booking your tours, and if you’re unclear, ask for clarification when you book!

Note that this is all subject to change. We’ll do our best to keep this post updated!

READ THIS POST

Colombia Itinerary: Ultimate Guide to 1 Month of Backpacking Colombia

All About San Blas/Guna Yala

To plan a trip to San Blas, all you’ll do is book a tour and pick the length of your stay – your hosts will take care of the rest. Transportation, activities, and meals will all be handled for you, without needing your input. Trust us: it will all be just fine!

Your time on the islands will be rustic, but relaxing. You’ll spend your time reading, listening to the waves, walking on the shore, swimming, snorkeling, eating incredibly fresh seafood, and relaxing.

Where are the San Blas Islands?

The San Blas Islands are located off the eastern coast of Panama in the warm Caribbean sea.

So they’re in Panama, right?

Well, to quote Bilbo Baggins, which I do often, no … and yes. While San Blas is technically part of Panama, it’s actually an autonomous Indigenous province, and it is run by the Guna people. It’s one of several comarcas Indígenas in Panama.

Sound confusing? We’ve actually got similar set-ups all over the USA. When you visit Monument Valley in the Southwest USA, for instance, you are actually visiting a Navajo Nation National Park, which just so happens to overlap on land that we also consider to be Arizona and Utah.

Since you are technically entering an independent province, be aware that you will need to pay a $22 fee as a non-resident.

Is it called San Blas or Guna Yala? (Or Kuna Yala??)

San Blas is the name given to this archipelago of islands by the Panamanian government. The name comes from the area’s location in the Golfo De San Blas.

Guna Yala, however, has been the official name since 2011. Guna Yala (which is also called Kuna Yala) is what the local Guna (or Kuna) people call their home. It means “land of Kuna,” or “Kuna’s land.” 

Both names refer to the same place, so they are used somewhat interchangeably.

Mola textile art for sale in the San Blas Islands, aka Guna Yala, Panama.
Mola textile art for sale in the San Blas Islands, aka Guna Yala, Panama. Purchasing a beautiful, handmade mola as a souvenir is a great way to support the Indigenous Guna community!

Who are the Guna people?

The Guna people are the residents of the San Blas Islands/Guna Yala. They are an Indigenous tribe with a long history that predates the existence of Panama and Central America.

The Guna people were living in and near the Darien Province in modern-day Panama and northern Columbia when the Spanish arrived in the 1500s. Conflict with the Spanish and the difficulties of living in the jungle forced the Guna to move northwest. They settled into the mainland coast and island archipelago (now known as San Blas), where they thrived.

But conflicts with other groups, including the Panamanian government, continued even after the Guna settled into their new home. In 1925, the Guna led a revolution against Panama in order to gain their independence. They were successful, but later agreed to rejoin Panama as an autonomous province.

Today, Guna law and tradition are the rule in San Blas. The Guna society is somewhat matriarchal. Typically, women make decisions, own property, and distribute food. Their belief system is based on three principal concepts: God, nature, and the cosmos. The Guna’s oral traditions are full of songs, hymns and prayers that tell stories of the beauty and majesty of the wind, the land and the sea and of the myths and legends that created and shaped the earth. To the Guna, people and nature are considered parts of the same entity. For more details about the Guna’s beliefs and culture, head over here.

You’ll see Guna people throughout your visit to the islands, but you probably won’t be co-habitating with them: most islands that tourists visit are dedicated entirely to tourism, and Guna communities are concentrated on other islands, not typically visited by tourists.
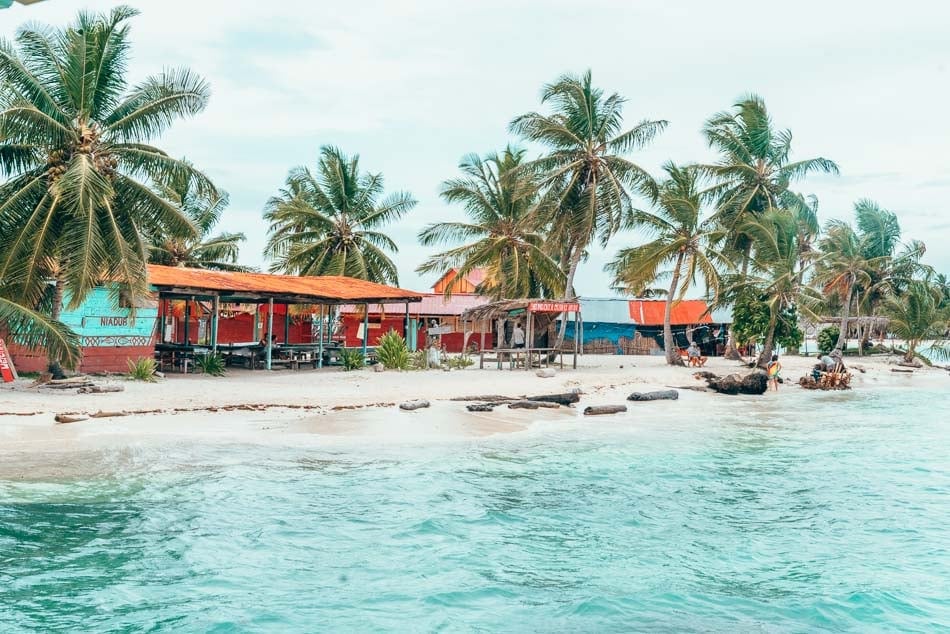
Beach in the San Blas Islands aka Guna Yala, Panama.
This island looks pretty inhabited, right? Nope: this is a tourist island! The islands tourists visit are uninhabited and are only for tourism. You may get a chance to see a Guna community on a day trip or boat ride past the islands – they look very different.

Are the San Blas islands inhabited?

While you won’t find any touristy cities or resorts on the San Blas islands, there are Guna communities on 49 of the 370 islands in San Blas. Some islands are closed to tourists – in fact, tourists can’t travel freely throughout the islands. The Guna lead tours and guide visitors at their own discretion, which has helped maintain the pristine natural environment and traditional communities.

About 50,000 Guna live in San Blas today, though the entire Guna population numbers around 300,000. The leaders of the Guna live on one island —  Acuadup — where they make a lot of decisions for their communities. 

Is visiting the San Blas islands ethical?

This was one of our primary concerns as responsible travelers. We wanted to make sure that our presence on the islands would not be disruptive or exploitive, and that the money we spent on our visit would go directly to the Indigenous community.

Thankfully, because the San Blas/Guna Yala islands are owned and maintained by the Guna people, all of the tourism to the islands directly benefits the Guna community and supports their economy.

In terms of economic impact, the Guna economy runs primarily on coconuts, tourism, and artwork. They export coconuts to other countries (which is why you are not free to pick a coconut in San Blas – that is stealing!) and host tourists on certain dedicated islands, providing them with food, lodging, and travel around the archipelago. You may not explore the islands on your own.

The Guna also make and sell molas, patterned cotton clothing designed with beautiful embroidered panels. Guna women wear these molas and sell decorative mola handicrafts to tourists.

You can also find molas in Panama and Columbia, but due to their cultural importance, the Guna don’t allow them to be sold outside of the region. Purchasing a beautiful, handmade mola as a souvenir is a great way to support the Indigenous community!

READ THIS POST

25 Things Nobody Tells You About Backpacking Bali, Indonesia

How to Plan a Trip to the San Blas Islands

Let’s talk logistics: how are we doin’ this?? Honestly, it’s very confusing. There are several different ways to visit the islands: you can sail from Colombia, take a day trip from Panama City, stay overnight, sail around the islands … it seems like a lot to figure out! But don’t worry, I’ll break down each of the options so you can make your decision.

No matter what you end up choosing, you’ll need to book either a tour (day trip, sailing, or overnight) or accommodation on the island (which is essentially the same as booking an overnight tour).

Although each option differs, your experience will be very similar no matter who you book with. The reason for that is that tourism on the San Blas Islands is strictly controlled and regulated by the Guna. The Guna only allows certain islands to be visited, only serve a few kinds of food, and do not have many luxuries or amenities (think in-room electricity or hot water). So there simply are not many options: you can pick a fancy boat or a small boat, a fancy bungalow or a small cabin, or a day trip. That’s … pretty much it! Everything else is pre-determined.

All of your decision-making happens now, while you’re planning your trip: once you arrive, either your boat captain or your hosts will tell you where to go and what to do, while you sit back and enjoy.

So first things first: you’ll need to decide how you want to experience the islands. How long will you visit? Will you be staying on an island, or sleeping on a boat? Let’s go through all of the options!

What’s it like to visit the San Blas Islands?

There are three ways to experience San Blas/Guna Yala: on a day trip, staying on an island for several nights, or staying on a sailboat and sailing through the islands. Each type of visit is a little bit different:

  • Visit San Blas on a day trip: You’ll depart from 5AM in Panama City, drive 2.5 hours to a water taxi, take a 30 minute boat ride, and hit the beach at around 9:30 AM. You’ll swim, snorkel, and relax, eat an included lunch, visit another island, and then head back around 4pm. By 7pm you’ll be back in Panama City.
  • Stay on the islands overnight: Whether you’re flying or driving in, you’ll take a boat to the island where you’ll be staying and settle into your room. Your morning tour will depart shortly after you arrive, and you’ll go to another island to swim or snorkel. You’ll return for lunch, relax for a bit, then take an afternoon tour (if you like) to swim and snorkel. You’ll return in time for dinner, then spend the rest of the evening relaxing and watching an absolutely stunning sunset. You’ll fall asleep listening to the waves lap the beach just outside of your cabin, then wake up for another beautiful day in paradise! Rinse & repeat for the duration of. yourstay. (Note that you can either book a tour like this or an accomodation like this – either way, your experience will be the same.)
  • Sail through the islands: You’ll depart from Panama City by car to the port, where you’ll board your new home: a sailboat (or catamaran, if you’re fancy)! You’ll spend a few hours each day floating across the beautiful blue Carribbean sea, before docking at a new island to have an adventure: kayaking, snorkelling, beach volleyball, hiking, or even traditional dancing in a Guna community. You’ll eat fresh seafood, learn about the Guna people, sit around a beach bonfire on the beach, and sleep in a hammock. Your guide will be with you throughout your stay and you’ll get to know them and the other people on your boat. After 4 days, you’ll return to Panama City the same way you came, except much more relaxed.

No matter which option you choose, you can expect to experience a different kind of life while you’re visiting.

For starters, on many of the tourist islands there’s no cell service or wi-fi, and very little power. That’s true whether you’re taking a day trip or an overnight trip, so don’t expect to be on your phone throughout your stay (we recommended bringing an external battery if that alarms you!)

If you’re sailing through the islands, your experience will mostly depend on the kind of boat you’re in. Boat options range from rustic to luxurious, and the amenities (and price) will vary too. For a rundown of what it’s like to sail through the islands, Silvia from Heart My Backpack has a great post!

We chose to spend 3 nights staying on Diablo Island in these cabins. Our accommodations were comfortable but rustic, although we had what we needed: a mosquito net, a comfortable bed, and a private patio steps away from the ocean (the waves lulled us to sleep every night)! Power was only available for a few hours per day – just enough for everyone to charge their electronics. Our hut did not have electricity, and the entire island shared one (well-maintained) bathroom. We did have some cell service through our local SIM card, but it was spotty.

It may feel jarring at first, but you’ll quickly get used to spending your time listening to the waves, swinging in a hammock, reading, swimming, watching the sunset, and strolling on the beach. It’s very much the sort of place where there’s nothing to do but just be present, and that was a gift that we definitely needed!

If I’m being honest, we struggled to adjust at first. We were hot and sweaty (there is no A/C or fans, just the ocean breeze). There were only 2 hammocks, and someone else was always using them. We were bored (I forgot to bring a book). This wasn’t paradise: it was hell!

But within a day or two, we adjusted. Our bodies got used to the heat, and we learned to cool off in the ocean. Our days adapted to the rhythm of life on the island: breakfast, activity, lunch, activity, relax for a while, dinner, watch the sunset. We stopped refreshing our cell phones and rebooting our laptops trying to get service so we could work (although I did take lots of photos and notes for this post!) And we spent our time just enjoying existing, listening to the waves, and being fully present.

By the end of our trip, we didn’t want to leave!

So, learn from our mistakes: bring a book (or several) some card games, and a journal, and enjoy being totally offline for a few days. Prepare yourself mentally for a rustic, totally remote trip that will be mostly out of your control, and just sit on the dang beach and relax.

Where to Stay on San Blas

You won’t find any large hotels or resorts in the San Blas Islands: every accommodation is owned and operated by the Guna people, and development is kept to a minimum. Personally, I find that this is part of the appeal and charm of the islands – how many places in the world have managed to stay so pristine?

That said, if you choose to stay overnight on the islands like we did, you do have some choice about the kind of accommodation you stay in. While we stayed in rustic huts, you can certainly upgrade. And remember, you don’t have to base yourself on a single island at all: you can also choose to sail around the islands on a sailboat or catamaran!

Here are a few options. Note that whatever you pick, you can be assured that it is owned and operated by the Guna people. The options below also include 2 daily tours and activities and all meals, too.

  • Budget Option – Isla Diablo Cabins: This is where we stayed. The cabins are rustic and simple but then, so are the San Blas islands. Your comfortable bed is covered with a mosquito net, and your cabin has a window and a small patio looking out over the ocean. The bathroom is shared but clean, and delicious, fresh meals are served a short walk away in the restaurant lounge (this is also where you’ll find a power strip you can use for a few hours each day). Our main gripe was that there were only two hammocks, so consider bringing your own! Other than that, our stay was absoultely picruesque and wonderful, and we definitely recommend booking a few days here. Just bring a few books. Also, don’t leave snacks out, because birds will come in through your window and eat them.
  • Fancier Option – Over-Water Bungalows: These gorgeous over-water bungalows are the San Blas version of luxury! You’ll have your own bathroom (just worry, you don’t need hot water, but also there isn’t any) and, hello, you’re literally on the water. Relax on your patio overlooking the ocean and just … ahhhh. There are two over-water bungalow picks: this one is a little cheaper, and this one is the full monty and priced accordingly (just remember: it’s still relatively rustic). They both include all meals and daily activities and tours.
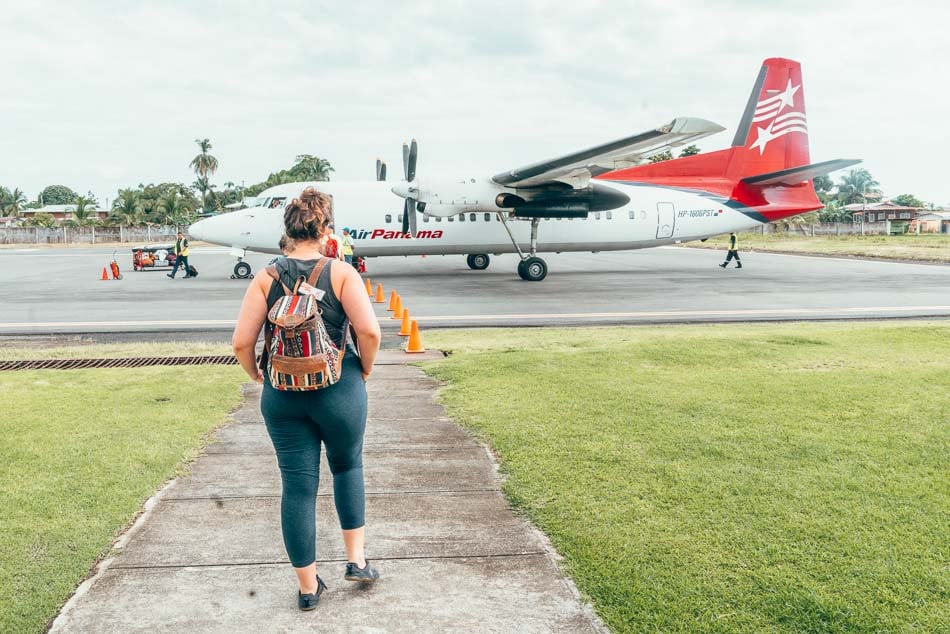
Lia walking up to an Air Panama plane.
To get to the San Blas Islands, you can take a small plane like this one (which was actually our flight from Bocas del Toro to Panama City), or take a jeep + water taxi.

How do you to get to the San Blas Islands?

There are two options to get to the San Blas Islands: driving or flying from Panama City, or taking a sailboat from Colombia.

The options that depart from Panama City are the fastest and cheapest way to get to the islands:

  • 4×4 Jeep Taxi + Water Taxi: The trip from Panama City takes about 4 hours in total. Most tours leave early in the morning and include a 2.5-hour 4×4 ride to the port, where you’ll then hop on a 30 to 45-minute boat to the islands. This is typically included in most day trips or overnight trips departing from Panama City, though if it isn’t, you can book it here – just ask when you book your tour or accomodation whether transportation to San Blas from Panama City is included or not.
  • Flight on Air Panama: Flights depart every day around 5-6am from Marcos Gelabert Airport (PAC) in Panama City. The flight lasts 45 minutes and costs about $350 round trip. If you opt for this option, be sure to let your accomodation know when you’ll be arriving so they can arrange. to pick you up.

Taking a boat from Colombia is another option and quite an adventure! You’ll be sailing for 4-5 days, and the transportation to get there is also your trip – you’re on a sailing tour of San Blas! There are two options: you can take a speedboat from Capurgana, Colombia or a sailboat from Cartagena, Colombia.

  • The sailboat from Cartagena is a 5 day trip, two days of which are spent on open water. Fair warning: seas can be a little rough! You’ll be spending most of your time in transit since you have more distance to cover.
  • The speedboat from Capurgana is a 4 day trip. The biggest challenge is getting to Capurgana – you’ll need to take a bus to Turbo and then take the two-hour ferry in the morning. But once you’re on the boat, you’ll spend less time traveling in between islands and more time enjoying yourself on the sand and in the water.

For a far more detailed breakdown, read this guide to help you decide which option is right for you.

Two of our travel blogger friends have great write-ups of their trips with San Blas Adventures: Adventures N Sunsets and Two Wandering Soles. Something to note is that both of their trips were hosted – but this review on Inspired by Maps, who was not hosted, is quite a bit less complimentary, so if you’re considering this option, read his post, too.

Which option should you choose?

It really comes down to cost, the kind of trip you want to have, and your travel plans. The cost of 4 days staying overnight in island accommodation is very similar to the cost of a 4-day speedboat, but you have to factor in the fact that you’ll need to purchase a one-way flight to Colombia and from Panama (or vice versa). That can raise the cost of the sailing adventure quite a bit!

So if you want to spend several days sailing through an idyllic Caribbean island paradise without the open-jaw flight conundrum, just book a sailing trip that departs and returns to the port in Panama.

That said: if you’re traveling long-term and need a way to get over the border from Colombia into Panama, this is your only option other than flying: the Darien Gap, which separates the two countries, isn’t passable overland! The sailing trip is only a bit more expensive than flying, but it’s WAY more fun.

San Blas Adventures charters full day, 1-night, 2-night, and 3-night sailboat and speedboat trips that include meals, snorkeling, and island visits. Sailboat charters range from around $300 – $600 per person, and speedboat charters (from Panama to Columbia or vice versa) start at $445.

San Blas Islands Panama Girl on Dock in Swimsuit Palm Tree
We visited San Blas/Guna Yala during the rainy season. See that cloud behind me? That’s it. That’s the “rainy season.” (Hint: very little rain.)

When’s the best time to visit San Blas?

There are 2 distinct seasons in the San Blas Islands: the rainy season (from June to December) and the dry season (from January to May). But don’t let the names fool you: the best time to visit San Blas is actually during the rainy season.

The dry season typically experiences strong trade winds, which can affect snorkeling visibility and, you know, blow sand in your face and stuff. They’re great for sailing, but not as nice for laying on a beach or seeing underwater critters!

The rainy season really just means that rain is more likely, and it typically only lasts for about an hour or so – which, frankly, we see as an excellent excuse to just sit and listen to the rain and relax for a while! There are occasional clouds, but much less wind. And no need to worry about hurricanes – this area doesn’t get them.

And, since most people tend to avoid places during the “rainy season,” you’ll probably see fewer tourists, too.

We visited the San Blas islands in July, and it did not rain during our trip. In fact, I didn’t realize we were visiting during the rainy season until I started researching for this post! There was perfect weather and sunny days throughout our trip.
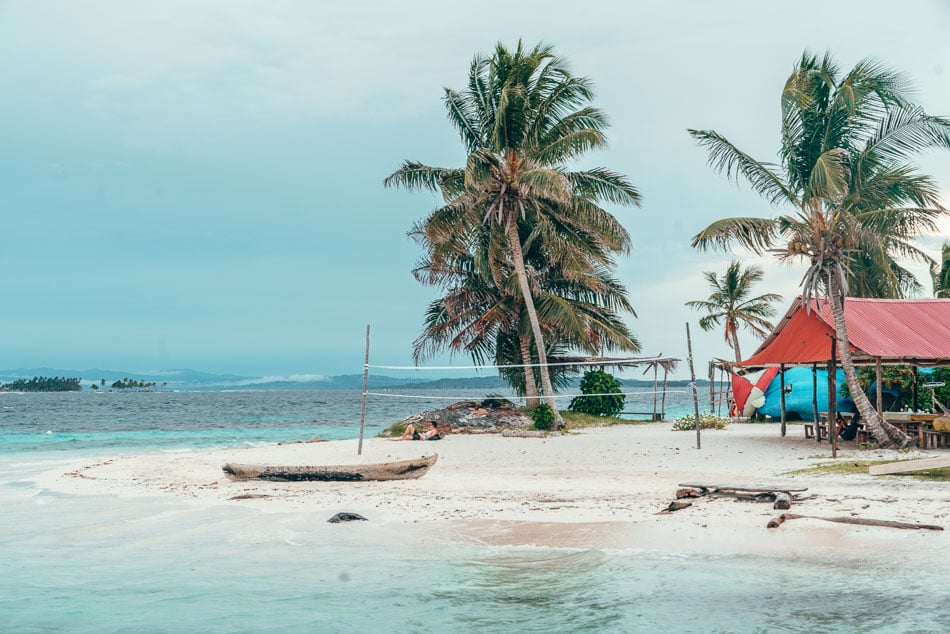
Boat and volleyball net on the beach in the San Blas Islands aka Guna Yala, Panama.

How long should I stay in San Blas/Guna Yala? 

San Blas is beautifully simple: swimming, sunbathing, and relaxing is just about all there is to do. It’s an amazing experience, but probably not one you need to extend for too long. A day trip or single night is enough to get a taste of the beauty of San Blas, and by the time you get back to the mainland, you’ll probably be ready for a shower anyway. 

That said, we spent 3 nights on the island. The first day or two, we were hot, sweaty, bored, and uncomfortable, and honestly, we couldn’t wait to leave! We were considering leaving early – we were that cranky.

But by day 3, we’d relaxed and eased into the zen of having nothing to do in particular. We were enjoying the sound of the waves, long walks on the beach, and the daily excursions to swim and snorkel on nearby islands. And we ended up wishing we’d stayed for a little longer!

If you need to fully unplug and relax, a 3-4 day adventure (overnight stay or sailing trip) is the perfect amount of time to really experience San Bas.

If your time is limited and you choose a day trip, be aware that will include a lot of traveling in a short amount of time. But if that’s all the time you’ve got, or you’re not interested in roughing it island-style, you can still experience San Blas. Check out these guided day trips that offer island hopping, snorkeling, and lots of tropical sunshine!

Two palm trees frame a boat in the blue waters of the Carribbean ocean off of a bright, white sandy beach in San Blas, Panama.

Are there many things to do in San Blas?

There is a short list of things you can do in the San Blas islands as a visitor. Here it is: Swim, snorkel, relax, rest, buy molas, eat fresh seafood, watch the sunset, relax.

Now, that’s not to say that there aren’t some specific attractions to visit, like a beautiful natural pool, Dog Island, Pelican Island, etc. But as a visitor, you don’t really get a choice of where you go or what to do: that’s entirely up to your hosts and the Guna community.

If you’re sailing through the islands, you’ll be visiting islands each day, spending some time snorkeling or stand-up paddle boarding or swimming, and then continuing onwards. You may or may not know where you are at any given moment, but it doesn’t matter: you’re gonna have a blast.

If you’re staying on the islands overnight, each day during your trip, you’ll be taken on two outings: a morning excursion, and an afternoon adventure. It will involve a boat ride to an island, where you’ll probably be able to swim or snorkel, and then you’ll return home in time for lunch or dinner.

You won’t necessarily know which island you’re on or what you’ll be doing that day in advance. Just go with the flow! Whatever you do will be fun and safe, and if you don’t like it, it won’t last for very long before you’re headed back to your “home” island.

Since you don’t have much of a choice of where you go or what you do within Guna Yala, there’s no sense in making a list of “must-do” activities. Just relax and go with it! (This is also the excuse I’m giving for why my notes from our trip were … incredibly lacking. Normally I’m trying to write down the names of absolutely everything we see and do on a trip to fact-check later. This trip? I kinda just gave up!)
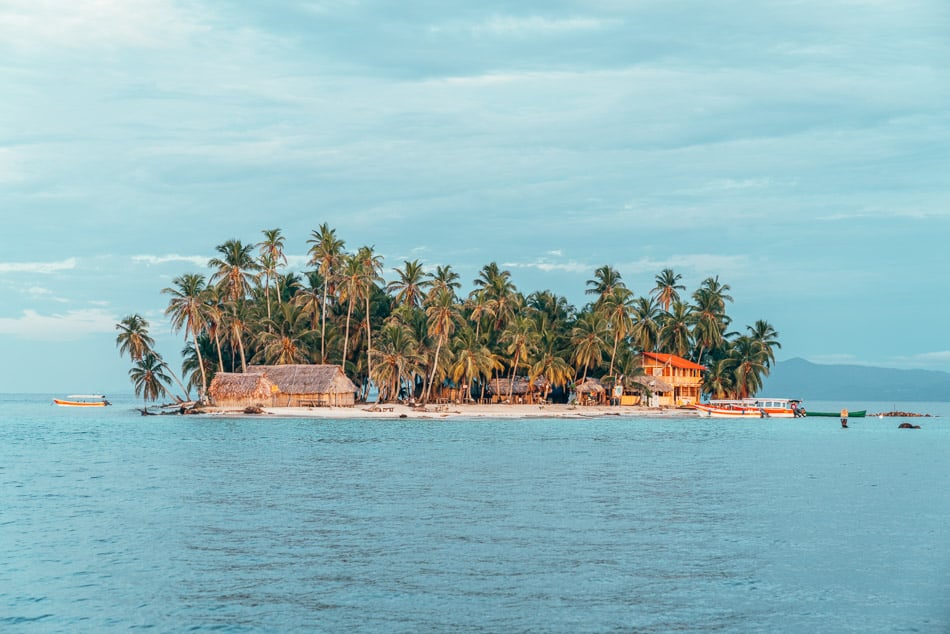
Island floating in the Caribbean in the San Blas Islands, Panama at golden hour.
Here’s a bonus tip: do not miss golden hour and sunset! The light is just *chefs kiss* magical!

More Tips for Visiting San Blas 

  • Bring cash for everything: There are no ATMs in San Blas. There isn’t much to spend your money on, but bring small bills for things like water and drinks. You may also want cash for incidentals, souvenirs, or the $22 Kuna Yala entrance fee.
  • The food is amazing, but if you want snacks, bring them: While your Guna hosts serve three delicious, fresh meals each day (like red snapper, lobster, and coconut rice), there aren’t any snacks available. Many tours include a stop at the grocery store on the way to the port so you can stock up on snacks. But note that if you leave food in bags in your room and then leave a window open, birds will come eat all your food. We speak from experience.
  • The islands are very rustic: Don’t expect luxuries like 24/7 electricity, A/C, or hot water – a flushing toilet is a luxury in San Blas (even more so if it’s not shared). Set your expectations to a realistic level and you’ll have a much more enjoyable time. One thing that wasn’t ideal for us is that there wasn’t really anywhere comfortable to sit on the islands. We wished that we’d brought our own hammock or beach chairs! Now THAT would be luxurious.
  • Bring bug repellent: Jeremy got dengue fever during our trip to Panama – it wasn’t dangerous or serious, but it was annoying and he kinda felt like crap for a few days. Honestly, I don’t think he was bit during our time in the San Blas Islands – more likely it happened while we were in Bocas del Toro or Boquete. But still, it sucked! To be safe, treat your clothing with Permethrin before your trip, and cover all of your exposed skin with bug repellant. We swear by this lightweight picaridin lotion that has a light, pleasant smell and doesn’t leave a greasy residue. We’ve got loads more packing tips below!
  • Get all your travel vaccines before your trip: You’ll want to be vaccinated for Hepatitis A, Typhoid, Yellow Fever and Hepatitis B (and, obviously, COVID). You don’t necssarily need to take malaria medication, ut San Blas is near a location where there is malaria (the Darién Gap), so if that freaks you out, just talk to your doctor and take malaria pills during your trip, no big deal!
  • Do NOT touch the starfish: The beaches and clear waters of San Blas are dotted with bright orange starfish. They’re beautiful and a joy to look at, but DON’T TOUCH! Touching them will hurt and kill them – yes, even if you’re gentle and put them back aferwards. Admire them from afar, please!

What to Pack for San Blas

Most of your time in San Blas will be spent in the ocean, swimming or snorkeling! You’ll also be in bright Caribbean sunlight. So your most critical items will be for the beach, for the water, and for sun protection.

For the Beach

Here’s what to pack in your luggage to bring with you to the beach:

  • Several Swimsuits: There’s a good chance you’ll be jumping into the water every day, so you’ll want to bring along multiple pairs of swimsuits so you always have something dry to put on! I’m a size 16/18, and my favorite swimsuit is this one, which I literally have in 3 different colors. It’s amazing. It’s perfect. It’s a freakin’ steal! I also love this suit, and this is my favorite one piece. For more swimsuit picks, check out my guide to swimsuits for curvy girls.
  • Travel Towel: There is absolutely no guarantee that the towels at your accomodation are going to fit around your waist. Frankly, they rarely fit around my left thigh. Plus, they’re heavy and bulky and you can get in trouble for bringing them out of the hotel. So just to be safe, I always bring my own travel-friendly, lightweight, quick-drying travel towel!
  • Travel Clothesline: Newsflash: your hotel’s moist, dark bathroom is the absolute WORST place to hang your clothing up to dry. Instead, hang this tiny travel clothesline up somewhere that gets plenty of airflow and sun, like on a curtain rod in front of the window! Your wet swimsuit and travel towel will be dry in no time.
  • Sand Repelling Beach Mat: I hate sand SO MUCH and this mat is made with magical sand-repelling qualities. If sand doesn’t make you want to go live in an igloo forever, you can always just use your towel as a mat instead!

On beach days, we pack up our day bag with all of our beach gear and a full bottle of cold water to stay hydrated (our insulated water bottle keeps water cold for an unbelievably long time). And of course, lots and lot of sunscreen – don’t forget to re-apply!

For more beachy packing tips and curvy-girl specific suggestions (ahem: do you have chafe balm yet??) head over to our beach vacation packing guide!
READ THIS POST

The 6 Best Swimsuits for Curves: Comfortable, Cute, & Field-Tested

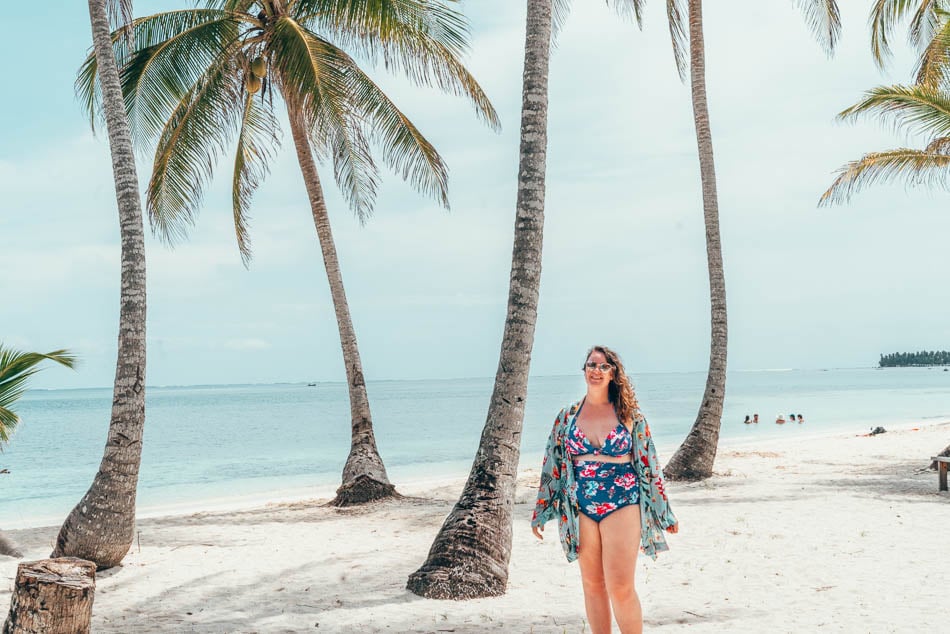
Curvy girl in a swimsuit amidst palm trees on an island in San Blas Panama
Each day during your trip to San Blas, you’ll be visiting islands like this and diving into the beautiful water! Please take care not to harm marine life by packing reef-safe sunscreen and NOT touching those gorgeous orange starfish.

For Swimming/Snorkelling

There are a few essential pieces of gear you’ll want to bring to keep yourself – and your underwater friends – safe and happy.

Here’s what to pack for swimming and snorkeling:

  • Reef-Safe Sunscreen: Going into the ocean? You need to wear reef-safe sunscreen. Unless you hate coral, fish, and also all of human life. Reef-safe sunscreen is designed to biodegrade and not harm ocean life. Regular sunscreen bleaches coral and ensures humanity’s swift death from climate change. So please, for the love of society’s inevitable collapse, wear reef-safe sunscreen if you’re going into the ocean! Note that although reef-safe sunscreen is always mineral, not all mineral sunscreens are reef-safe. Sunscreen must use “non-nano zinc oxide” particles to be reef safe(more details here). This is my favorite reef-safe sunscreen, and I use this lightweight sunscreen on my face.
  • Rash Guard/Swim ShirtI’m gonna be honest with you: reef safe sunscreen is not the easiest to apply. It’s thick and doesn’t soak in easily. But like, I love animals and the environment. So my solution is actually to cover up my skin as much as possible so I don’t HAVE to wear sunscreen. Win/win! Sure, you may want to show off your super cute swimsuit, but after enough awful sunburns after hours of happy swimming or snorkeling, I’ve learned my lesson. I highly recommend bringing along a long-sleeved rash guard, which is specially designed for swimming in salt water. It feels the same as swimsuit material, dries quickly, and gives you plenty of sun protection (also protection from stinging bits of jellyfish floating by in the water. Yup, I speak from experience).
  • Swim Leggings: My butt is always the first thing to burn when I’m snorkeling. But swim leggings provide full-coverage sun protection while letting you move underwater without restriction. Quick-drying swim leggings are designed to hold up in saltwater and chlorine and dry quickly once you’re out of the water (they are also incredibly comfortable to walk in, and prevent the dreaded post-swim chub rub). I love Waterlust’s swim leggings line because the brand is super sustainable and supports conservation and anti-racism initiatives, plus their leggings are 100% chlorine, sun, saltwater and sunscreen resistant and made from recycled materials. Oh, and their leggings have POCKETS! Sizes go up to 3XL. For more details, head over to the full review of my swim leggings!
  • Snorkel Mask & FinsFor years whenever we traveled to a snorkel-tastic destination, we always wished we’d brought our own snorkel gear. We were so envious of those people who rolled up to the boat like “oh, we don’t need rental gear, we have our own.” Every time I met someone with their own gear on a tour I was like oh, you must be an expert – here, you go first. They probably got better pictures just because we were intimidated. Snorkels equal power. Anyway, then we bought our own gear, and I was like … why did we wait so long to do this?! Sure, my snorkel mask may look ridiculous, but I guarentee you it’s better than anything you’re going to get from a tour company!
  • Anti-Fog Spray: Even if you don’t bring your own snorkel gear, at least bring your own anti-fog solution. Every time we rent snorkel gear, we end up surfacing to furiously spit in our masks ever 10 minutes. So annoying! A little bottle of this will save you a LOT of irritation.
  • Water Shoes:  For every minute that you’re not wearing flippers, you’ll want to be wearing water shoes. I swear by my trusty leather Tevas, and Jeremy also likes classic close-toed water shoes.
  • Dry BagDon’t set foot on a boat without putting your stuff in a dry bag, just in case. You never know when a wave/rogue sea lion is going to splash your sh*t. This one is excellent, with a mesh section in the front that we use for wet bathing suits or towels. Plus, it comes with a phone protector too, so you can wear & use your phone safely while white-water rafting, kayaking, or snorkeling!
  • Travel Towel: Towels are not typically provided on snorkelling tours, so we always bring our own full-sized, quick-drying travel towel
Dock on Isla Diablo in the San Blas Islands, Panama
San Blas is a lot closer to the equator than the USA, and that means the sun is much stronger! Take special care when it comes to sun protection.

Sun Protection

Here are the essentials to bring with you on your trip to protect you from the sun:

  • Reef-Safe Sunscreen: Going into the ocean? You need to wear reef-safe sunscreen. Unless you hate coral, fish, and also all of human life. Reef-safe sunscreen is designed to biodegrade and not harm ocean life. Regular sunscreen bleaches coral and ensures humanity’s swift death from climate change. So please, for the love of society’s inevitable collapse, wear reef-safe sunscreen if you’re going into the ocean! As a fun bonus incentive, it’s actually required by law in Hawai‘i. Although reef-safe sunscreen is always mineral, not all mineral sunscreens are reef-safe! Sunscreen must use “non-nano zinc oxide” particles to be reef safe (more details here). This is my favorite reef-safe sunscreen, and I use this lightweight sunscreen from Sephora on my face.
  • Mineral Sunscreen: This is the least harmful type of sunscreen, according to science. Mineral sunscreens use two natural minerals—zinc oxide and titanium dioxide—as active ingredients. They basically simply sit on top of your skin and protect it by physically reflecting away UV rays, like tiny little mirrors. Meanwhile, regular chemical sunscreen soaks into your skin and ends up in your bloodstream (and breast milk, according to this study) which squicks me out. Mineral sunscreens do not soak into your skin (according to this study). So even though mineral sunscreens can feel a bit heavier than chemical sunscreens, I prefer to use them anyway! I use this one for my body, and for my face (which is more sensitive) I use this lightweight mineral sunscreen.
  • Mineral Sunscreen Lip Balm: Don’t forget to protect the delicate skin on your lips from sunburn, too!
  • Sun Hat: Who says sun protection isn’t cute? This comfortable hat protects your face, neck, and chest from the sun and goes with every outfit. The adjustable band around the rim guarantees that this hat will fit your head perfectly, and the neck cord means you can wear it even when it’s windy! This is my go-to everyday hat.

In addition to everyday sun protection, you’ll want to take extra care on days you’ll be spending more time than usual out on the water, like on a snorkeling or kayaking tour or even just when you’ll be swimming in the heat of the afternoon sun.

I’m a huge fan of wearing swim clothes to protect your skin and cut down on the amount of sunscreen you’ll need to use! I highly recommend bringing along a long-sleeved rash guard and a pair of swim leggings for sun protection during water sports.

Remember: the more your body is covered, the better you’ll be protected from the sun, and the more environmentally friendly your beach vacation will be! Psst: For more eco-friendly and responsible travel tips, head over to our Ethical Travel Guide.

  • Travel Tip: In case you DO get sunburnt, a bottle of aloe vera will help. But an even better sunburn treatment? Apple cider vinegar! It smells terrible but it works miracles to take the sting out of a bad burn and speed up the healing process. Plus, it doesn’t feel sticky and gross on your skin. I bring a little spray bottle full of ACV on every beach trip.
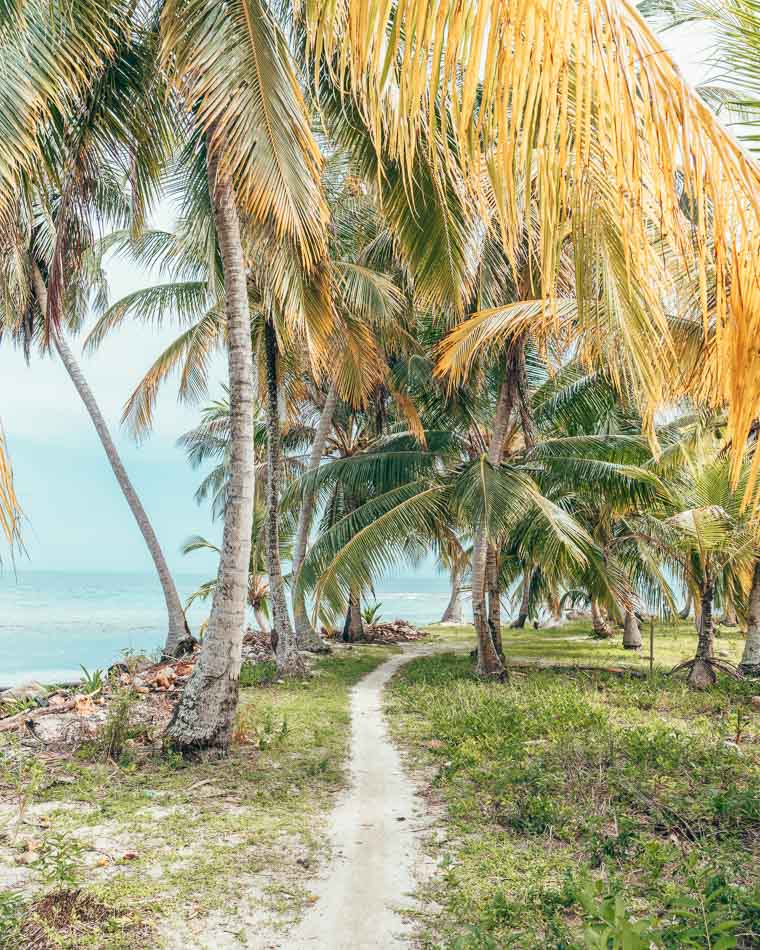
Beach path in the San Blas Islands aka Guna Yala, Panama
You may not see bugs in this photo, but trust me: they’re there! Your room will probably have a mosquito net, but we’ve got a couple more suggestions to make sure you don’t get bit.

Bug Repellant

Nothing ruins a trip like a sleepless night spent frantically trying to ignore your itchy legs. Or worse, mosquito-bite-induced Dengue fever, which Jeremy caught in Panama once (yeah, it sucked).

But where there are beautiful places waiting to be explored, there are bugs! So we’ve learned to make our peace with them – through the use of extremely effective bug repellants. We absolutely swear by these 2 essential bug repellants, and we rarely get bitten during our trip!

Here’s what you’ll need to tell mosquitos to back the f*** up during your trip:

  • Permethrin SprayLet me introduce you to our favorite thing ever, Permethrin Spray. It’s a bug repellent which adheres only to fabrics, leaves no smell or residue on clothes, and doesn’t harm human skin. Think of it like a magical, invisible armor on all of your clothes! We recommend stocking up on a few bottles before your trip and spending a couple of days spraying down all of your clothing, paying special attention to hems, cuffs, and socks (and extra-special attention to whatever you’ll be sleeping in). Make sure you do it outside, keep pets away, and wear a mask, because nobody wants to inhale chemicals (which, incidnetally, is why I hate aerosol bug sprays). Permethrin spray lasts for up to 6 machine washes, but … well, we don’t wash our clothes very often on vacation (ssh, don’t judge). Now you’ll only need to focus on covering your skin with bug repellant, which brings us to …
  • Insect Repellant LotionMost insect repellents are not worth the unpleasant oily feeling you get after applying them, the icky hacking cough you develop after spraying them, or that skin-burning feeling you get after applying 100000% chemicals to your skin. There is, however, one insect repellant that avoids these pitfalls, and it’s this amazing lightweight Picaridin lotion. You rub it into your skin and it absorbs crazy fast with no oily residue. It lasts all day and the coverage is amazing. It doesn’t smell disgusting, leaves no sticky or oily residue, and it’s never made my skin burn. I love it, I swear by it, and yes, we definitely hoard it in 1-gallon jugs. This is one of our tried and tested travel essentials, and we typically get a LOT fewer bites than our travel companions! Pick up a couple of travel-sized 2oz bottles of lotion to take in your carry on luggage, or go all out on the quart or gallon-sized dispenser and fill up some empty bottles like us!
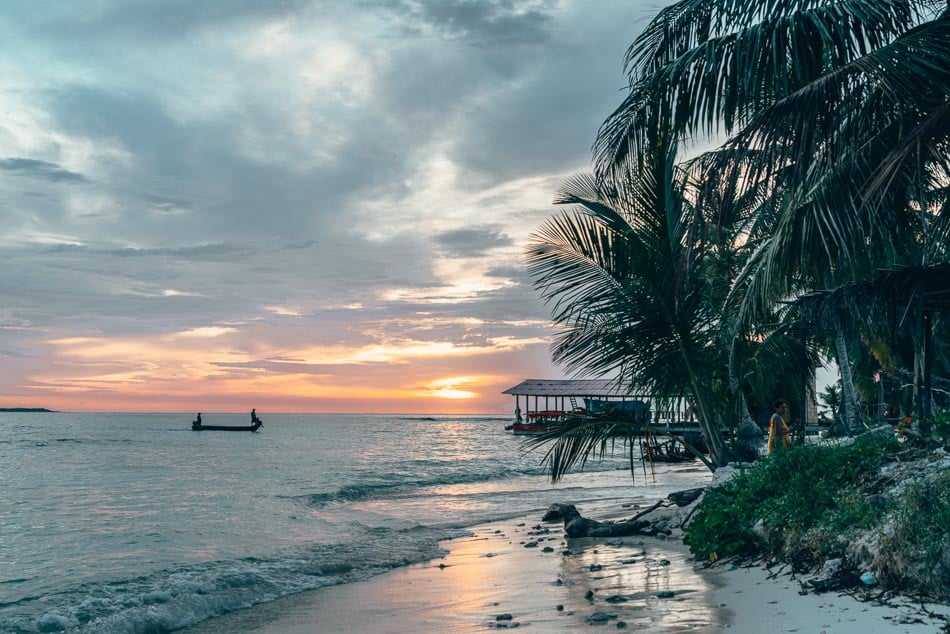
San Blas Islands Panama Boat at Sunset
You don’t need much else when you’ve got a sunset view like this, ya know? But. …we do have SOME suggestions.

Other Essentials to Pack

Here are a few other essentials to pack in your suitcase:

  • Anker External Battery: You won’t have very much access to elecricity. But if you plan to use your phone at all (even just for taking photos), you’ll want it to stay charged. This external battery is our favorite – it lasts for several charges and can totally refill your phone super fast.
  • GoPro: You didn’t come all this way to NOT get underwater footage of yourself living your best mermaid life, did you?? You gotta have a GoPro! They’re hands down the best camera for capturing footage underwater. Just make sure you also pick up the Standard Housing,  the waterproof case that you’ll definitely need before you go underwater! For a more budget-friendly option, this waterproof action camera will also do the trick.
  • Solar Powered FlashlightThis flashlight is awesome, and super handy for finding the bathroom or navigating at night. You’ll never need batteries and you’ll always have a little light when you need it. We keep ours clipped onto the outside of our backpacks so it’s charging whenever we’re outside. Environmentally friendly AND convenient!
  • e-Reader or Kindle: A good book is an absolute essential for the San Blas Islands! There’s nothing better than spending a whole, luxurious afternoon laying in a hammock reading a really good book. But books are heavy and take up a lot of space in your luggage, so we prefer e-readers! Our Kindle Fire is our constant travel companion. (Except we only have one, so we’re constantly fighting over it.)

READ THIS POST

What to Pack for South America: 32 Backpacking Essentials


Are you excited to rough it island style? Will you be picking a sailing tour, day trip, or overnight visit to the San Blas Islands? Tell us in the comments below.

Psst: Planning more island adventures? We have explored a lot of islands! Find them all here or check out some of our favorites.

xo Lia & Jeremy signature graphic

FOLLOW US!

Psst: Save this post for later on Pinterest!

Our Top Travel Tips & Resources

Here are our favorite travel tips & resources for saving money and planning travel logistics! For more tips, check out our complete guide to trip planning.

  • Booking Flights: To score flight deals, search on Skyscanner or Kayak. Money-saving tips: fly mid-week or on the weekend; fly carry-on only on a budget airline; and take red-eyes or early morning flights.
  • Accommodations: We usually stay in budget-friendly, vacation rentals, boutique hotels or private rooms in hostels. We use Booking.com to book hotels (we love their flexible cancellation policy) and Hostelworld to book hostels (low deposit, easy change/cancellation, and excellent reviews). For vacation rentals, we prefer to book using VRBO (they’ve got lower fees and better support than Airbnb, and we’re not fans of Airbnb’s unethical track record.) You can also book vacation rentals on Expedia and Hotels.com. We’ve also used TrustedHousesitters as both hosts (for our home and our fur-child) and travelers!
  • Travel Insurance: We always, always, ALWAYS buy travel insurance for international trips, and we STRONGLY suggest it – visit our Travel Insurance Guide to find out why. We recommend either World Nomads or SafetyWing for international travel insurance. SafetyWing is one of the few policies that covers Covid-19, and they have excellent monthly policies that are perfect for Digital Nomads and long term travelers!
  • Vaccines & Meds: We use the travel guides on the CDC website to research recommended medications and vaccines for international trips. We always recommend getting every vaccine recommended by the CDC! You can get them at your primary care doctor’s office or a walk-in pharmacy.
  • Tours: We love booking guided tours, especially food tours and walking tours, to get a local’s perspective and a history lesson while sight-seeing! We book our tours using Viator and GetYourGuide.
  • Transportation: We use Rome2Rio to figure out how to get from place to place using public transit. When we book a rental car, we use Kayak to compare rental companies and find the best deal.
  • Luggage Storage: Whenever we’re checking out early or taking advantage of a long layover, we use Stasher or LuggageHero to safely store our luggage while we’re running around. On Stasher, you can use the code PW10 for 10% off your booking!
  • What to Pack: Here are the travel essentials that we bring on every trip. We also have packing lists for hot weather, cold weather, and many more. Take a look at all of our packing guides!

Different Options for Having Fun This Labor Day | Top World Travels

For most Americans, Labor Day is the day for wrapping up the summer and kicking off the rest of the year with a fun experience. Since many employers provide Labor Day as a paid holiday, you have a chance to use that long weekend for a great time with your friends and family. Here are a few great options for making your Labor Day into a time you’ll always remember.

Head to the Beach

There is nothing quite so quintessentially summer as spending time at the beach in the sun. And Labor Day is a great chance to finish the summer on a high note at the beach. Whether you live near the ocean or have to make a road trip to the shore, a beach vacation is worth the travel time. Plan activities for yourself so you can enjoy your beach day to the fullest. It’s also a good idea to bring plenty of snacks and a picnic lunch so you are well fed to fuel your beach adventure.

Go into the Outdoors

The long weekend will also give you a chance to get out into the great outdoors. You can experience the outdoors in any way that works for you. Whether you take a camping trip, go on a hike, or hit a local lake for some canoeing, the end of the summer is the perfect time to enjoy being outside. Montana is full of natural attractions for outdoor types to enjoy. Make sure that you plan for safety and are prepared for whatever your outdoor adventure will bring.

Host a Barbecue

Labor Day is also a great excuse to gather with all your friends and neighbors to eat great food. Hosting a barbecue is a great way to finish the summer strong and strengthen your bonds with the people you care about. Make it potluck style so you aren’t responsible for the whole feast and let your guests each bring their own specialty. Planning some games and activities will help the barbecue to be an even greater success.

You deserve a beautiful end to the summer and doing something fun for Labor Day can make that a reality. Take some time to get outside and enjoy the great weather with your loved ones. Then you’ll be ready to get back to work and be productive since you will be happy and refreshed.

Read this next: The World’s Most Beautiful Beaches To Visit!

How to Prepare for a Long-Term Volunteering Trip Overseas | Top World Travels

There are many reasons why you may have to travel overseas. These long-distance trips can take a lot of planning, especially if they are for volunteering trips. Whether you are traveling for business or pleasure, there are similar steps you need to take if you want to leave the country.

Prepare Financially

Traveling tends to cost a lot of money, even when you are planning to volunteer. Not only will you spend funds once you get to your destination, but you will also have to use your money beforehand. According to Practical Wanderlust, you will have to buy special supplies like adapters, packing cubes, and money protectors. If you need to provide your own tickets to fly to your volunteering trip, that can be another large expense. Once you are at your final location, you should set a budget in the local currency. This can prevent you from overspending just because you did not understand the exchange rate.

Take Care of Your Health

One aspect of overseas travel to keep in mind is the difference in the quality of healthcare. If you have any health-related problems that could be resolved before your trip, you should prioritize them. The last thing you want is to be stuck in another country where you cannot speak the language and end up struggling in a hospital to get help. One health issue you should take care of before your trip is wisdom teeth removal. According to Stellar Family Orthodontics, impacted wisdom teeth can lead to many problems such as tooth pain and gum disease. Wisdom teeth removal can be a quick preventative measure to avoid future pain.

Travel Visa

Depending on where your long-term volunteering trip is, according to Good Hope Volunteers, you might need to acquire a visa to stay in the country as long as you need to. Typically, you should apply for a visa at least 1 or 2 months before your trip. This allows plenty of wiggle room for the paperwork to be processed. In most cases, the organization you are volunteering with will inform you of what you need. If that is not the case, you can always contact your local embassy online. Once you get a visa, make sure you return to your home country in the allotted amount of time to avoid issues when traveling.

Volunteering can be a great way to help your fellow man. If you choose to volunteer abroad, you will also experience and learn from another culture. To help your trip go smoothly, take time to plan for everything you need beforehand.

Read this next: Why You Should Research Health Care Before Traveling

Utah Mighty 5 Road Trip Guide

On this Utah National Parks road trip, you'll canyoneer through slot canyons, ride horses and ATVs, hike through a river canyon, watch the sunrise over a hoodoo-filled canyon, and catch a sunset through a massive stone arch. You'll visit Zion National Park, Bryce Canyon, Capitol Reef, Arches National Park, and Canyonlands National Park. And you'll discover why Utah's Mighty Five are considered some of the best National Parks in the country, all on one epic Utah road trip!

Things are changing rapidly – please double check what’s open before your trip. And be sure to follow all local guidelines to keep yourself and others safe! Finally, ads are how we pay our bills and keep our blog free for you to enjoy. We also use affiliate links; if you make a purchase through them, we may receive a small commission at no cost to you.

Red rocks, stone arches, colorful hoodoos, hidden slot canyons, and alpine forests. Utah’s five National Parks, called the Mighty 5, are spread out across the state and feature a mind-blowing range of desert and mountain ecosystems, from the sandstone cliffs and turquoise lagoons of Zion to the pinnacles and mesas of Arches. Although Utah’s big 5 are spread out across hundreds of miles, it’s doable to connect the dots and visit all five on one epic Utah National Park road trip!

In this 10-day Utah Mighty Five road trip itinerary, you’ll canyoneer through slot canyons, ride horses and ATVs, learn about ridiculous pioneer and Mormon history, hike through a river, watch the sunrise over a hoodoo-filled canyon, and catch a sunset through a massive stone arch. You’ll see more stars than you ever knew were possible, sleep in a Conestoga wagon, and eat Navajo Frybread. You’ll visit Zion, Bryce Canyon, Capitol Reef, Arches, and Canyonlands National Parks. And you’ll discover why the Mighty Five are considered some of the best National Parks in the country!

To create the perfect Utah road trip itinerary, we tapped Jenny Willden, who grew up in the suburbs of Salt Lake City and has been exploring Zion National Park and her home state since the age of six. She still recalls riding horses across the Virgin River and sleeping in a cabin right in Zion Canyon—long before overcrowding made these rooms nearly impossible to book. Take it away, Jenny!

Psst: Planning more road trips? We have a few other posts on our road trip adventures

We also have a bunch of other travel guides within Utah including several posts about Salt Lake City!

Psst: Planning a Utah national parks road trip? We’ve created a free, printable version of this itinerary! Plus, we’ll also send you our favorite tips to help you plan your Utah road trip. Just sign up below.

A road going by a barn and leading to a canyon in the background in Fruita at Capitol Reef National Park in Utah
The road to Fruita at Capitol Reef National Park in Utah. You’ll be here on Day 8 of this 10-day itinerary!

Utah Road Trip FAQ’s

How to get to the start of this Utah National Parks road trip?

If you’ll be flying in, you’ll want to book your flights out of Salt Lake City International Airport and rent a car on arrival (we recommend using Kayak).

Sure, you could fly into Las Vegas, or even book an open-jaw flight, but for this itinerary, it makes the most sense to fly round trip from Salt Lake City. Here’s why:

  • Las Vegas is only 2 hours from the start of this road trip (St. George), but it’s 7 hours from the end of the road trip (Moab).
  • Salt Lake City is 4 hours from the start of the road trip (St. George) and 3.5 hours from the end of the road trip (Moab).

So there’s less driving in total if you fly out of SLC, and you don’t need to worry about paying a one-way car rental fee, either!

For those of you lucky enough to be within driving distance of Utah, sit back and enjoy your road trip. You’ll want to head towards Las Vegas first, as it’s just 2 hours from the start of our Utah road trip itinerary.

  • Travel Tip: Booked your flight and rental car yet? We recommend using Kayak to price-compare deals and dates to save money… so you can spend more on food during your trip (#letsbehonest). If you’re lucky enough to snag a campsite in a few of the parks, consider renting an RV so you can sroad trip and sleep under the stars in style! We recommend using RVShare, which lets you borrow RVs directly from their owners.

READ THIS POST

29 Things Nobody Tells You About Oakland, California

What’s the best time of the year to take a Utah National Park road trip?

The best time to visit Utah’s national parks is in the spring (April-June) and fall (September-November), preferably on a weekday. These are the shoulder seasons, and visiting in those months means you’ll avoid the heat of the high season, and the crowds that gather when school’s out for summer. 

Summer (June-August) is easily the most popular time to visit Utah national parks, but that doesn’t mean it provides the best experience. It’s too hot for hiking during the day, meaning you’ll want to go early in the morning or in the evening. However, water activities like tubing or hiking in the cold waters of The Narrows in Zion are more pleasant when the summer sun is blazing. 

Winter (November-March) is a beautiful, quiet time in Utah’s Big 5, and despite the cooler temperatures and limited services, it’s worth it to have the whole place to yourself. The Kolob side of Zion is closed in winter, and Bryce Canyon National Park can become impassable if snow is in the forecast. Otherwise, you could do the majority of this itinerary in the winter off-season, but count on many restaurants to be closed or operating on limited hours.

  • Travel Tip: A winter Utah National Park road trip is the perfect opportunity to rent an RV. You’ll be able to cook your own meals and sleep toasty warm at night, plus it’s much easier to snag a spot at the park’s campsites. Just make sure you rent an all-season RV with four wheel drive! We recommend using RVShare for RV rentals.

READ THIS POST

The Best Salt Lake City Ski Resorts: a Complete Guide to Skiing in Salt Lake City

What’s the Indigenous history of Utah’s National Parks?

Before native people and pioneers settled in what is now Utah, most of the state was covered by Lake Bonneville, an ancient lake that existed 14,000 years ago. The Great Salt Lake is all that remains of this mighty body of water, but Lake Bonneville’s original shoreline can be seen on many local hiking trails.

Beyond this lake, Native Americans settled in Utah’s wild landscapes, and more than 50 tribal nations called the state home, from Ancestral Puebloans who built cliff dwellings to prehistoric hunter-gatherers that left behind petroglyph rock art. Today, Utah is home to eight federally recognized tribes.

The largest groups of Native people remaining today include the Ute tribe, whose ancestral lands are east of the Great Salt Lake, and the Navajo Nation tribe which maintains a large swath of land adjacent to many Utah National Parks.

You’ll see many Native American landmarks throughout the parks, and some of Utah’s best parks, including Monument Valley in southern Utah, are actually on Navajo land and are owned and run by Navajo Nation. To visit, you’ll need to book a tour with a Navajo guide and your federal park pass won’t cover the entrance fee, since the US federal government and the Navajo Nation government are separate entities. Although it’s not included in this road trip itinerary, it’s well worth a detour if you’ve got some extra time!

Delicate Arch at sunrise in Arches National Park in Moab Utah
Delicate Arch at sunrise in Arches National Park in Moab Utah. Sunrise and sunset are absolutely stunning in the desert, so our itinerary includes plenty of early morning hikes and sunset activities!

Things To Know Before Taking a Utah National Park Road Trip

Utah is a massive state, and covering Utah’s Big 5 in a short amount of time comes with its own challenges. Here are a few of the oddities of Utah, and the best practices for making your road trip a hit. 

  • Sunrise and sunset are the best times of day!

We’ve included a lot of sunrise and sunset hikes and activities on this itinerary. And while waking up early or hiking in the dark isn’t everyone’s cup of tea, it’s well worth it in Utah. The desert sunrises and sunsets over sweeping canyon views are EPIC, and they’ll be the most memorable parts of your trip!

Plus, hiking at those hours means less hot sun, which means a significantly lower risk of sunburn or heatstroke. Just make sure you pack a headlamp so you can see where you’re going! (And maybe some high-quality instant coffee, too…)

  • Driving times on Google Maps are typically accurate.

However, you are going to stop WAY more than you think for views, bathroom breaks, and meals, so you’ll want to add plenty of extra time.

Utah is still the wild west in a lot of ways, and there are long stretches with no gas stations, especially inside the national parks. Top off often to keep your gas tank full. 

  • Use rest stops when you see them.

Even if you don’t have to go, you might want to as restrooms are rare on rural roads. Bring along hand sanitizer and toilet paper in case the loo is unstocked.

  • Utah’s state parks are worth a visit too.

You might breeze right by a hidden gem like Snow Canyon State Park if you focus only on Utah’s national parks. But state parks are typically less crowded, less expensive, and feature much of the same dramatic scenery! We included Snow Canyon in this itinerary, so you’ll actually be visiting 5 National Parks and one awesome State Park.

Thanks to its large Mormon population, Utah has some, er, unique liquor laws. You’ll find wine and hard alcohol only in state-run liquor stores. Cocktails are carefully metered by a clicking device that measures a 1.5-ounce pour, and don’t even think about asking for a double. It’s illegal and can get your bartender in serious trouble with Utah’s alcohol overlords.

There are also some guidelines about what’s allowed to be served on tap, and whether you need to be sitting or standing to drink or order alcohol – and things are constantly changing. But don’t let any of that discourage you: Utah has a fantastic beer scene! We’ve got a guide to the best breweries in Salt Lake City with more details.

This is more than just “don’t litter.” Cryptobiotic soil and other fragile ecosystems are primary features in Utah’s national parks. Watch where you step, pick up your trash, and leave campsites and trails better than you found them.  

  • Don’t do it for the ‘gram.

A photo isn’t worth your life. Obey closed signs, stay far from cliffs, and don’t engage in risky behavior just to look cool. Consider not tagging precise locations in your photos to prevent extra crowding on already busy trails. 

Utah police officers LOVE to ticket speeders—even if you’re only going five over the posted speed limit. Watch your speed and set cruise control to avoid a hefty ticket.

That said, Utah’s speeds are faster than most around the country, ranging from 70-80 miles per hour on freeways. Use caution and watch for wildlife to stay safe as you drive, but also totally crank up your favorite tunes and enjoy yourself!

The average cost of admission to a National Park is $35, which means that the pass will pay for itself during your trip and save you about $100. You’ll be able to continue using your pass for a full year at over 2,000 National Parks, and 10% of the sale proceeds are donated to the National Park Foundation, helping to keep our parks beautiful! Pick up a pass online at REI or in person at any National Park.

READ THIS POST

The Best 8 Hikes Near Salt Lake City, Utah (A Local’s Guide)

The Utah Mighty 5 Road Trip Itinerary

Before we kick off this Utah National Parks road trip, here are a few things to note:

  • Arrival: If you’re flying in you’ll be starting and ending your trip in Salt Lake City. But if you’re driving in, you’ll be closer to Las Vegas at the start of the trip, so just skip Day 1 on the itinerary and head over to our Las Vegas guide to figure out how to spend your first day in Sin City.
  • Drive time: The total drive time of this itinerary is 16 hours spread out over the course of 10 days. Each day has drive time notes to help you plan.
  • Trip length: With a day spent in each destination, you’ll be able to hit the highlights of each National Park, but if you want to stay longer in some parks, you might want to consider extending your trip. If you don’t quite have 10 full days, you can adjust the itinerary by flying into Salt Lake City and heading directly to St. George, instead of spending the night in SLC – effectively skipping Day 1. And if you’re really short on time, you could also cut out Snow Canyon and head straight to Zion National Park, which would take you right up to Day 4 of this itinerary! That means you could complete the road trip in just 6-7 days if you really wanted to – or stretch it to a full 10 and spend more time in another National Park or around Moab.
  • Inclusivity: We’ve done our best to make the itinerary flexible and inclusive for varying athletic abilities. Whenever we recommend an intense activity or hike, we’ve also suggested a more approachable alternative.
  • Accomodation: We’ve included recommendations for hotels each night of the trip, but if you’re able to snag camping spots (book well in advance) and bring your own camping gear, this itinerary makes for a fantastic camping trip or RV road trip! I recommend renting a fully equipped RV from RVShare so you don’t need to bring as much gear.

And finally, you’ll definitely want to pick up a National Parks Pass before your trip. The average cost of admission to a National Park is $35, which means that the pass will pay for itself during your trip and save you about $100. You’ll be able to continue using your pass for a full year at over 2,000 National Parks, and 10% of the sale proceeds are donated to the National Park Foundation, helping to keep our parks beautiful! You can pick up a pass online at REI or in person at any National Park.

OK, let’s hit the road!

Day 1: Arrival in Salt Lake City

  • Today, you’ll arrive in Salt Lake City and spend the day exploring downtown.
  • Drive Time: Very little!

Utah’s national parks are a bit remote from an international airport. Fly into Salt Lake City for the easiest access without the mega ticket price of flying into the small St. George airport.

Depending on when your flight arrives, hopefully you’ll have some time to explore. Salt Lake City is a beautiful city ringed with mountains – you’ll literally see mountains no matter where you look! In the summer, those mountains are criss-crossed with hiking trails, and in the winter, they’re a snow sport paradise.

The city has fantastic coffee, food, and beer, and a fascinating history. To dive into that history, head straight to the Pioneer Memorial Museum (admission is free!)

You’ll get to see not only an original copy of the Book of Mormon and the illegally printed money that led to Joseph Smith’s death by angry mob (LDS history is SO INTERESTING) but also an original hand-cart … you know, of HandCart Tragedy fame. Pioneer and LDS history is WILD and we’re so intrigued by it!

Once your mind has been thoroughly blown, walk through Temple Square to see the fruit of the labor of LDS pioneers. They literally arrived in an empty desert and built the entire city – and those stunning temples – from scratch with their bare hands, fueled by the promise that they were in the “land of milk and honey.”

You can also tour the home of their prophet and leader, Brigham Young, called “the Beehive House” (the city has a whole worker bee/honey theme goin’ on). Tours are led by the LDS, which means if you want some non-religious context before your visit (you do), we recommend reading up in advance – the book Brigham Young: Pioneer Prophet is excellent pre-trip reading material. But here’s a quick primer: Brigham Young had 55 wives (some very young) and 56 children, colonized much of Utah’s inhabited land often through violence and cruelty, and invented the LDS policy of “blood atonement,” which is essentially justified murder in the name of God. He also oversaw the building of Salt Lake City from an empty desert to a thriving metropolis, governed the Utah Territory (which was more or less a polygamous theocracy), and declared war on the US government.

What did we say? The history is fascinating.

When your mind is good and reeling, head over to Red Iguana for the best Mexican food in Utah (Utah was, after all, once a territory of Mexico). The restaurant was made famous after a feature on Diners, Drive-Ins, and Dives. There might be a line to enter, but trust us – it’s worth it! (If you prefer walking, head to Blue Iguana right from Temple Square. It’s not owned by the same people, but it’s still good.)

After dinner, get a taste of Salt Lake City’s incredible beer scene. Head to Kiitos Brewing, Toasted Barrel, or Proper Brewing for some of the best beer in Salt Lake City. Or hit up one of the city’s many other breweries and brewpubs – we’ve got a whole guide to help you decide!

For your night in Salt Lake City, we recommend the Kimpton Monaco, a quirky boutique hotel with a great restaurant and a daily wine happy hour located right downtown. We also love this cute, budget-friendly apartment a five minutes’ walk from Temple Square, and this beautiful penthouse loft with city and mountain views!

Day 1 Summary

READ THIS POST

The Ultimate Salt Lake City Brewery Guide: 25 Best Salt Lake City Breweries & Brewpubs

Day 2: Salt Lake City to St. George

  • Today, you’ll be driving from Salt Lake City to the outdoor adventure town of St. George, where you’ll spend the afternoon outdoors!
  • Drive Time: 4 hours from Salt Lake City

First things first: when you wake up in Salt Lake City, head straight to the best coffee shop in town, Publik Roasters. Grab an avocado toast or smoked salmon toast for breakfast, and hit the road.

You’ve got four hours of driving ahead of you, so turn on your favorite playlist or podcast. If you’re still reeling from the Pioneer Museum and Temple Square, we highly recommend the 5-part series on Mormonism from Last Podcast on the Left (start with this episode). It’s a little crude at times, but generally well-researched and entertaining.

You’ll be heading straight down I-15. If you’re in no particular hurry, there are a few worthy stops to make. Take a picture of an exact replica of the house from Up, frolic through lavender fields at the beautiful Young Living Lavender Farm (just don’t get swept up and join an MLM!) and soak in Meadow Hot Springs along your drive.

After a few hours, you’ll arrive in St. George on the southern Utah border. St. George is a Mormon-pioneer-founded town that’s blossomed into an outdoor adventure capital in the red rock desert, and the best jumping-off point for your Utah National Park road trip. The 62,000-acre Red Rocks Desert Reserve is the town’s main draw, both for hiking and seeing endangered desert tortoises!

You’ll be hungry after your drive, so drive straight to the art enclave of Kayenta for lunch at Xetava Gardens Cafe. It’s a 20-minute drive from Main Street, but the locally sourced, fresh fare is better than anything you’ll find in town. 

After lunch, you can walk around the beautiful and quirky Kayenta Art Village, where you can discover local artist shops, a fine art gallery, an arboretum, and even a labyrinth.

You’ve spent all day in a car, so for the rest of the afternoon, you’ll be outdoors!

  • Go hiking in Snow Canyon State Park: This small but mighty park is named for Utah pioneers Lorenzo and Erastus Snow, not for the weather you’ll likely encounter. Snow Canyon’s soaring sandstone cliffs, winding slot canyons, and dark underground lava tubes spread through 7,400-acres and are explorable in a day, but there’s plenty more to explore on future visits. Hike Hidden Pinyon Trail, an easy nature walk that showcases cacti, sagebrush, and rock formations like layered sandstone waves and towers. Opt for the longer loop of the Hidden Pinyon trail to climb atop petrified sand dunes for panoramic park vistas. Jenny’s Canyon Trail is a very short stroll to a red rock slot canyon and a sweeping view of the desert landscapes. And if you’re feeling adventurous, drive up the canyon to s ee ancient lava on the Lava Flow Trail. Bring along a bright headlamp (not a cell phone light) to explore cave-like lava tubes formed after a volcano eruption 27,000 years ago. Be aware: these underground tunnels are pitch black and can be dangerous to enter!
  • Take an ATV Tour: Ready to get your adrenaline pumping? Head out into the desert in an ATV! You’ll climb through a box canyon into the sand dunes and take in panoramic lake and mountain views in Sand Hollow State Park. All equipment is provided and no experience is necessary – just, er, hold on tight.

Once you’ve worked up an appetite for dinner hit up George’s Corner Restaurant & Pub in the heart of downtown for a delicious meal. They’ve got the perfect post-hike comfort food fare, like baby back ribs, buttermilk fried chicken, cheeseburgers, and mac n cheese.

Across the street, wrap up your night at Zion Brewery Station II, St. George’s first microbrew. It’s pretty exciting to have a brewery in St. George as this teetotalling town was long dry (thanks to the local Mormon majority). But as out-of-state tourism has increased and the population has diversified, breweries and bars are opening in town. 

When you’re ready to retire, hang your hat overnight at The Advenire. Unique boutique rooms and a rooftop pool make it the perfect downtown destination. Or, if you like ar oom with a view, head up the hill from town to Inn on the Cliff. This small hotel includes free breakfast and offers red rock cliff views from every room. Don’t miss the Inn’s incredible outdoor pool which also overlooks the red rocks!

Day 2 Summary

A sweeping view of Snow Canyon State Park with mountains in the background in Utah

Day 3: Canyoneering & Exploring St. George

  • Today, you’ll go canyoneering in a slot canyon and explore the charming desert town of St. George. 
  • Drive Time: None, all activities local

Hope you got a good night’s sleep: you’ll be up early for a guided, 6 am slot canyon tour with Paragon Adventures! Get a quick caffeine fix at FeelLove Coffee or Perks then head to Paragon Adventures for your early morning adventure.

Canyoning/canyoneering is, essentially, getting yourself down into and then out of a canyon using all kinds of methods: hiking, rappelling, swimming, umping, scrambling, zip-lining – you name it! In this tour, you’ll rappel hundreds of feet down red rock slot canyons, hike through water pools, and scramble over boulders. Your tour guide will provide all the gear and transportation and teach you the art of maneuvering through a canyon safely.

After your 4-5 hour slot canyon adventure, fuel up at Angelica’s Mexican Grill, a local favorite with a fabulous fresh salsa bar and Mexican street food specialties. Utahns love Mexican cuisine, and Angelica’s is the most authentic, popular option in town. We love the Mulitas, a corn quesadilla loaded with beans, rice, and meat. 

  • Alternate option: If you’d rather sleep in a little later and don’t mind a bit more driving, this canyoneering tour is just outside of Zion National Park, only an hour away. Tours run at 8am and 2pm, so you’ll have some extra time to snooze!

After an adventurous morning you’ll want a more low-key afternoon, so we recommend exploring the town of St. George. Here are a few options:

  • Head to Ancestor Square, a charming square filled with historic buildings that now house shops, boutiques, and galleries. Strolling around this area, you’ll see some of St. George’s finest historic homes and buildings, and informative placards point out historic landmarks in town. Continue your LDS education and take a tour of Brigham Young’s winter vacation home, located on one corner of Ancestor Square. The ornate home sits in a neighborhood of well-preserved pioneer homes, of which are open to the public or offer tours. If you like, you can also visit the grounds of the St. George Utah Temple.
  • Visit the McQuarrie Memorial Museum, run by the Daughters of Utah Pioneers who also maintain the museum in Salt Lake City. Here you’ll find an amazing collection of pioneer and LDS artifacts, which again, are a lot more exciting when you know some of the absolutely wild history behind them (ahem: go ahead. andorder Brigham Young: Pioneer Prophet from your local library.)
  • Visit the St. George Dinosaur Discovery Site. Here you can see thousands of fossilized dinosaur footprints, dating back 200 million years! There are also five life-sized models of prehistoric animals and a working fossil preparation lab.

Once night falls, enjoy pioneer-inspired American cuisine at Wood Ash Rye. This newer restaurant in The Advenire Hotel dazzles with dishes like homemade biscuits, chimichurri carrots, and housemade pasta.

Due to the prominence of the teetotaling Latter-Day Saints (aka Mormon) faith in St. George, delicious adult beverages are hard to come by. But Wood Ash Rye mixes up the best (only?) craft cocktails in town. Try the W.A.R. Valley Tan if you’re craving smoky whiskey or the Desert Rain for something fresh and fruity.

Day 3 Summary

READ THIS POST

10 Incredible Zion Hikes: a Complete Guide To Hiking in Zion National Park

Day 4: Zion National Park

  • Today, you’ll head into Zion National Park to explore its canyon cliffs, spires, slot canyons, and waterfalls!
  • Drive Time: 1 hour from St. George to Zion National Park Springdale Visitor’s Center

It’s finally time to head into the mightiest of Utah’s Mighty Five: Zion National Park! It’s a one-hour drive from St. George to Springdale and the entrance of Zion National Park. Get an early start by eating breakfast at your hotel and heading ASAP for the park entrance. You can also grab cold brew coffee and a delicious breakfast just outside the park entrance at Feellove Coffee.

Some things to keep in mind about getting around Zion National Park:

  • If you’re visiting Zion between February and November, the only way to get around the park is by using the free shuttle service, which is first-come, first-serve. You’ll need to park your car somewhere in Springdale and then board the shuttle into the park. The National Park Service does this to reduce emissions pollution, traffic, and parking issues, so it’s really a blessing in disguise!
  • The first shuttle leaves the Zion Visitor’s Center at 7 am and the last shuttle leaves the Temple of Sinawava at 6:15 pm. Look for a full schedule at one of the park’s shuttle stops when you arrive.
  • Since you’ll be traveling on the shuttle’s set schedule, you need to make sure you don’t miss one of the next to last shuttles out of the park. It’s very important that you do not wait for the very last shuttle because there is an almost guaranteed chance that that bad boy is going to be filled to the brim, causing you to be well up sh*t creek without a paddle once you have to walk back to where you’re staying. Totally not ideal, especially when you’ve spent all day walking only to have to walk all the way back to camp or your hotel!
  • If you’re visiting Zion in December or January, the only way to get around is by your own car because the shuttles do not run, so parking is a free-for-all. Winter is less busy, but it’s not desolate, so waking up early is highly recommended so you can grab a parking spot!

Once in the park, the best way to see Zions’ dramatic landscapes and towering canyon walls is with your own two feet! Fill up a hydration daypack and hit the trails. We’ve got a full guide to the best hikes in Zion National Park, but here are two solid choices:

  • Hike Angel’s Landing: Strong hikers who aren’t afraid of heights will love the 5.4 mile, out-and-back climb up fin-like rock formations and exposed chains to Angels Landing, which is considered to be one of the most dangerous hikes in the United States. What makes this hike so intense? Well, in order to reach the expansive view over Zion Canyon, you must first scale a razor-thin rock ledge with a 1200-foot drop on both sides using only determination, grit, and the aid of some metal chains hammered into sandstone. But if you can stomach it, the view at the top is both shocking and rewarding. To do this hike, get off on the shuttle at The Grotto (Stop 6).
  • Hike the Emerald Pools and Upper Pool trails: For less daredevil hikers, stay closer to Earth on the Emerald Pools path. This two-mile hike follows a stream up to waterfalls and the Lower and Middle Pools. Continuing on the steep trail to the Upper Pool is worthwhile if you have the energy.

Alternatively, if you’re not up for a hike today, book a horseback riding tour in Zion Canyon to see the landscapes like early pioneers would have!

Once you’ve finished hiking or horseback riding, return to the visitor’s center for lunch and a brew with a view at Zion Brewery, where you can get something hearty like fish ‘n chips or an elk burger. Its outdoor patio is just outside the park entrance and showcases the towering red rock cliffs that make Zion famous. 

Just across from the brewery you’ll find Zion Outfitter, an outdoor shop which rents gear for biking, tubing, and The Narrows. After all that hiking your legs will definitely need a rest, so rent a tube and cool off with a float down the Virgin River (when conditions allow). The soundtrack of your two-hour-long river cruise will be filled with birds singing from the cottonwood trees overhead, water flowing over river rocks, and the roar of mini rapids as you make your way downstream. 

  • Update: As of summer 2021, there is a toxic Cyanobacteria bloom in the Virgin River and the Streams of Zion National Park, so tubing is not available at this time. Avoid contact with the water, especially submerging your head or drinking it. You can keep an eye on the Cyanobacteria bloom here. Instead, we recommend booking a scenic helicopter tour for the afternoon!

When you return your tube, rent gear for hiking The Narrows tomorrow. This makes it easier to start the day bright and early to hike this bucket list riverwalk. Gear is first-come, first-serve so confirm they’ll save a set for you before tubing. You’ll need to rent proper water hiking shoes, a walking stick, dry pants, and bring your own socks to keep you comfortable in cold river water. (Dry pants are not necessary in the warm summer months.) 

  • Note: If you think all the hiking from today may wear you out and you’d like to avoid The Narrows tomorrow, you can skip the rental and just plan to visit the ghost town of Grafton instead!

After you’ve loaded your gear in the car and ready to leave for the day, if you weren’t lucky enough to snag a campsite then head for The Dwellings in La Verkin. Each tiny home unit has its own kitchen, fire pit, and a balcony overlooking the canyon and river. 

Walk from here to dinner next door at River Rock Roasting Company, easily the best dining option in town. Don’t miss the flavorful Moroccan-style Amerikesh salad and unique Phuket Peanut pizza. Wind down afterward with drinks on your patio overlooking the river. 

Day 4 Summary

READ THIS POST

9 Awe-Inspiring Things To Do in Zion National Park, Utah: The Ultimate Guide to Zion

Day 5: Zion National Park

  • Today, you’ll either hike The Narrows, or sightsee and explore a ghost town of Grafton. In the late afternoon you’ll drive through to park to East Zion, the park’s quieter side
  • Drive Time: 1 hour 15 minutes from the West to the East side of Zion NP

Start with coffee and fresh pastries next to The Dwellings at River Rock Roasting Company, then hit the road early and take the park shuttle to Temple of Sinawava to start the trail to The Narrows. The shuttle can get extremely crowded so plan to depart early, or expect a long wait, but it’s worth it to see 2,000-foot canyon walls, waterfalls, and turquoise river waters paired with red rock on this world-famous trek. 

Hiking the Narrows in the summer can be overwhelming, with intense crowding and selfie-snapping. Winter is a more peaceful time to experience this wonder, but you must be outfitted with winter wear, dry pants, and neoprene socks to avoid hypothermia (and remember the shuttles don’t run in the winter!). You can definitely hike The Narrows in fall as water levels allow, but hiking it in spring is typically a no-go due to snow run-off. 

To begin The Narrows, get off on the Temple of Sinawava shuttle stop and hike along the Riverside Walk trail until reaching the river entrance. Step into the water, using your rented stick to steady yourself, and hike upriver!

No permit is required for this bottoms-up section, and there’s no particular destination you must reach. Most people try to reach Wall Street, the narrowest part of the canyon that’s two miles from the start (4-miles round trip in total) but you can hike all the way to Big Springs (4.5 miles, or 9 miles round trip) without a permit. This spot features springs and waterfalls and is the mandatory turn-around spot for day hikers. However, going this far makes for a long day as you’re continuously in knee- to waist-deep water!

Once you’ve hiked in and out again on either a 4-mile or 9-mile adventure, take the shuttle back down the canyon to fetch your car from the visitor’s center in Springdale. Refuel with a late lunch at Oscar’s Cafe with bottomless chips and salsa and green chili enchiladas.

If you’re opting out of hiking The Narrows, you’ll be exploring a ghost town and sightseeing across some stunning landscapes in Zion National Park on this tour. Start with brunch at Oscar’s Cafe and then head to meet up with your tour around noon.

Grafton was an abandoned pioneer town was built by Mormon pioneers. But they faced insurmountable odds: floods, disease, and attacks by the local Black Hawk tribes drove them back to the safety of larger settlements. Today the old cemetery – (which, yes, is super haunted), school, and homesteads remain almost unchanged from the 1800s. Oooh, it’s so creepy!!

Whether you hiked The Narrows or went sightseeing and exploring Grafton, it’s time to say goodbye to the West side of the park and Springdale. You’ll be heading through the park – take your time, the scenery is incredible – to the East Side to reach Zion Ponderosa Ranch Resort, a 4,000-acre property with more onsite amenities than any resort west of the Mississippi River.

The resort has a wide range of accommodations to fit all budgets: you can choose to stay in a glamping tent, a surprisingly roomy Conestoga wagon, cabin, or a whole-a** house. Whichever you choose, you’ll have access to amenities like a resort-style swimming pool, ziplines, and astronomy tours. We stayed in a cabin with a private fire pit!

Keep things easy tonight and enjoy pizza and burgers at the ranch at Ray’s Restaurant. Wrap up the evening with activities on Zion Ponderosa Ranch’s property, like a sunset Jeep tour or an astronomy tour paired with s’mores and hot chocolate. 

Day 5 Summary

READ THIS POST

14 Epic Things to do in Yosemite National Park, California

Day 6: Zion and Bryce National Park

  • Today, you’ll depart East Zion for Bryce Canyon, enjoying a scenic drive through charming small towns along U.S. 89 past otherworldly red rock hoodoos and sandstone spires.
  • Drive Time: 1.5 hours from Zion Ponderosa Ranch to Bryce Canyon

Start the day with a breakfast buffet and coffee at the ranch from Ray’s Restaurant.

If your legs aren’t beat from hiking The Narrows or Angels Landing, take in Zion Canyon’s best view from Observation Point. There was a trail in the park to this point but since rockfall closed it, the only way to see Observation Point is from a trail at Zion Ponderosa Ranch Resort. So think of this as a resort exclusive. Oooooo!

While the trail is just over three miles each way, it is a mostly flat, rolling path until the very end. Once you reach the edge of the 2,200-foot precipice, you’ll know the miles were worthwhile: Observation Point is the best place to take in the grandeur of Zion’s pink, red, and cream sandstone cliffs from above.

Say your goodbyes to Zion National Park – you’re headed to the next of Utah’s Big Five!

Once your morning adventure is over, it’s time to depart for Bryce Canyon National Park on the U.S. 89. 

Stop for lunch at Thunderbird Restaurant: Home of the Ho-made Pies. You’re on an all-American road trip, so get a burger and a slice of ho-made peach or apple pie (the unnecessary hyphen tells you it’s legit).

After lunch, make a quick stop in the tiny town of Orderville for coffee and Utah-sourced rocks at Rock Stop. The rock-shaped building is nearly impossible to miss, and it’s surrounded by gems, stones, and crystals you can purchase as souvenirs. Inside, the owners make European-style cappuccinos to recharge you for the road.

Continue along U.S. 89 north to enter Bryce Canyon from the west on Scenic Byway 12. You’ll pass right through Red Canyon, a stunning red cliff canyon filled with sandstone hoodoos (AKA rock spires), iron-rich pink soil, and evergreen pines. 

Most people blaze right on through to Bryce Canyon, but I recommend stopping in Red Canyon to ride bikes or just walk around the red Martian landscape. (You can rent a bike at Bryce Bike Rentals or Ruby’s Inn.) Red Canyon’s paved five-mile bike path winds past sandstone spires and Ponderosa pines and is a favorite stop in the area. A tunnel cut through the red rock is a thrill to photograph and drive through as you continue on to Bryce.

Arrive by sunset to take in the largest concentration of hoodoos in the world from Bryce Canyon’s aptly named Sunset Point. The “golden hour” is the prime time for photographing these formations from atop the scenic plateau overlook.

Sleep just outside the park at Ruby’s Inn, a historic hotel (turned Best Western) with the best access to Bryce Canyon National Park. Dining options aren’t very inventive near this national park, so keep it simple: the hotel has 3 separate dining options onsite. (Don’t worry, tomorrow’s dinner is epic.)

  • Note: If you choose to camp instead of staying at a hotel, be aware that temperatures are significantly colder here than Utah’s other national parks due to the high elevation. Snow is infrequent but definitely possible in the winter and spring months. 

Day 6 Summary

Hiking through Cathedral Valley in Capitol Reef National Park Utah
There’s nothing like towering monoliths of stone to make you feel like a teeny tiny speck! Welcome to Cathedral Valley in Capitol Reef National Park, Utah.

Day 7: Bryce to Capitol Reef National Park

  • Today, you’ll follow Scenic Highway 12 from Bryce to Capitol Reef, pausing for hikes and views in the towns of Escalante or Boulder Mountain.
  • Drive Time: 2.5 hours from Bryce to Capitol Reef 

Start your morning early with a quick breakfast and coffee at Ruby’s Inn.

If you thought sunset over Bryce Canyon was impressive, you’ve gotta catch the sunrise at Sunrise Point. See its vermillion-colored formations up close by following the 1.8-mile (3.6 mile round trip) Queens Garden Trail from the rim and into Bryce Canyon. It’s the easiest trail into the canyon but still requires a 320-foot uphill hike to complete.

Once the sun is up, head out of town. You’ll be continuing along Utah Route 12 Scenic Byway, rated one of the most beautiful drives in America. It adds 30 minutes to your trip going this way, but the extra time is worthwhile for unreal views – and incredible food!

Nicknamed the “All American Road,” Highway 12 Scenic Byway traverses tiny towns, drives through two arches, winds through pine groves and valleys before twisting and turning up Boulder Mountain. 

Caffeinate at Kiva Koffehouse, just outside Escalante, before climbing this winding route. 

Now it’s time to drive the steepest, scariest section of State Route 12. Cliffs drop steeply off the sides of the road atop of Boulder Mountain Pass at 9,606 feet, but this dicey drive is worthwhile for the panoramic vistas of the Dixie National Forest’s sandstone cliffs, desert, and pines.

  • Note: This road may not be for you if you’re uncomfortable with the exposure or narrow roadways. Unfortunately, this and the 35-mile unpaved Hell’s Backbone Road are the only routes connecting Boulder to Torrey so you may want to skip this section of the trip if you’re not up for the drive. 

Once you cross the mountain pass, descend into the town of Boulder and grab a grass-fed burger, fresh trout, or fried green tomatoes at Burr Trail Grill

After lunch, explore the remnants of a prehistoric Native American village at Anasazi State Park. The area was occupied by Ancestral Puebloan people in roughly 1050-1200 A.D. and was one of the largest communities west of the Colorado River. 

From pit houses to cliff dwellings, these people were known for their incredible building techniques, and you can see a six-room replica of an Ancestral Puebloan dwelling at the park. Once you’ve wandered through it, explore the museum and see artifacts excavated from the site.

When the dinner bell rings, hightail it to Hell’s Backbone Grill. This legendary restaurant is a James Beard award winner hidden in a town of under 300 residents. Prices are high, but worth it for the ever-changing seasonal menu of farm-to-table fare. Savor local red trout served with organic vegetables, or fuel up with hearty grass-fed meatloaf paired with lemony mashed potatoes. 

Once your belly is full, follow Highway 12 to the golden sandstone and secret slot canyons of Capitol Reef National Park. This quiet red rock wonder is home to the Waterpocket Fold—a wrinkle on the earth that extends 100 miles!

Camping in the park provides the best access to trails, but many rental properties and glamping options are available too. For a rustic and pioneer-esque experience, sleep in a Conestoga wagon at Capitol Reef Resort. I mean, come on, you have to, right??

If you’re itching to stretch your legs, sneak in a sunset walk on the 1.8-mile Hickman Bridge Trail, an easy Capitol Reef trail that leads to an impressively large sandstone arch spanning the red rock canyon and one of the park’s main attractions. Or simply take a sunset drive through the park to admire its stone slots, arches, and towers. 

Day 7 Summary

READ THIS POST

10 Things to do Park City, Utah on a Weekend Getaway

Day 8: Capitol Reef and Arches National Park

  • Today, you’ll take a quick tour of Capitol Reef before hitting the road to Moab and Arches National Park.
  • Drive Time: 2.5 hours from Capitol Reef to Moab

Before venturing into Capitol Reef National Park, fuel up at The Pioneer Kitchen at Capitol Reef Resort or the Wild Rabbit Cafe.

Capitol Reef National Park is a hidden, underrated gem. It’s rarely busy like Utah’s other national parks, and while you could spend days exploring, it’s easy to hit the highlights in a day.

Start in the heart of Capitol Reef at Fruita Historic District, a place inhabited by the Fremont culture thousands of years ago, and later farmed by Mormon pioneer settlers. Historic orchards are home to cherry, apricot, peach, pear, plum, and almond trees, which you’re allowed to harvest fruit from when in season. Visit the Gifford Homestead to learn about Mormon pioneer families who farmed the lands and planted the orchards and then enjoy a slice of pie made with local fruit.

If you’re up for a short hike, take in overlook views of Fruita on the 1.7-mile Cohab Canyon Trail, which leads up above the farms and into a canyon famous as a hiding place for Mormon polygamist women. Polygamy was officially banned in the late 1800s, but many settlers continued with the practice in remote areas like Capitol Reef. Federal officers were sent to enforce the law, and women fled into the canyon so the husbands could pretend they only had one wife (not unlike the plots of Big Love and Sister Wives). The 500-foot gain is worthwhile to see hoodoos, hidden slot canyons, and side trails before returning the way you came. 

If you have time for another hike, head to the Cassidy Arch Trail. This 3.1-mile hike is one of the park’s most spectacular and features uphill sections, switchbacks, and rocky terrain. The payoff is seeing this massive arch named for Wild West outlaw, Butch Cassidy, who used to hide from the law in these canyons. But keep in mind you still have a 2.5 hour drive to get to Moab!

After your hike, follow Highway 24 through the park to see soaring sandstone cliffs and formations at Sunset and Panorama Points. Look for a petroglyph pull-off along the highway where figures drawn by early Native American residents cover several rock panels.

Continue along Highway 24 until you hit the highway and head to Moab. Turn on that podcast again, it’s a 2.5 hour drive – though you’ll probably be stopping to admire the view and take pictures often!

When you arrive, stop for dinner in the hills above Main Street at Sunset Grill, the oldest operating restaurant in Moab. Pair the desert sunset views with plates of pasta topped with housemade marinara sauce, and end your meal with homemade razzleberry pie filled with raspberries, blackberries, strawberries, and rhubarb in a double crust.

Get ready to unpack your bags and spend two nights at your last accommodation on your Utah road trip. I stayed at the Hoodoo Moab by Hilton, which features a beautiful pool and is 10 minutes from Arches National Park. If you’re looking for something a bit more budget friendly, we recommend Expedition Lodge, directly on Moab’s walkable Main Street and also 10 minutes from Arches National Park.

Or, if you’re not quite ready to leave the beauty of Utah’s quiet, colorful desert landscape just yet, check-in at Under Canvas Moab for luxurious canvas tent glamping under the stars! You’ll be about 20 minutes from Canyonlands, 10 minutes from Arches, and a 15 minute drive from downtown Moab.

Day 8 Summary

Day 9: Arches & Canyonlands National Parks

  • Today, you’ll explore the incredibly scenic Arches and Canyonlands National Parks.
  • Drive Time: 30 minutes from Moab to Canyonlands, and another 30 minutes from Canyonlands to Arches

While the town of Moab is closer to Arches National Park than Canyonlands, I recommend starting your day in Canyonlands due to morning crowds in Arches. Arches’ park gate is often closed in the morning when too many people enter, but late afternoon and evening is a quiet time to explore this red rock wonderland. 

Grab a breakfast sandwich and coffee in town at Moab Garage Co. then hit the road for Canyonlands. Order a lunch sandwich to-go, too.

The deep, dramatic canyons of Canyonlands National Park were formed by the currents of Utah’s Green and Colorado rivers over thousands of years. Its cliffs, pinnacles, and mesas stretch over thousands of acres and three distinct districts, making it hard to see much on a one-day visit – but you’re gonna see everything you can! That said, if you have extra time, Canyonlands is a great place to explore without crowds. But if you only have today, it’s best to make a mad dash back to Moab for an afternoon at Arches. 

Once in Canyonlands, head to the iconic Island in the Sky. This mesa sits on sandstone cliffs 1,000 feet above the surrounding landscape, giving it the impression of being a floating “island.” It’s the easiest area of the park to reach, and every pull-out on its paved scenic drive showcases dramatic desert landscapes. 

Drive a portion of the 100-mile White Rim Road that loops through Island in the Sky, or stop at Grand View Point to overlook famous geologic features like The Maze and The Needles

Next, head to Grand View Point to see red rock mountains, canyons, and basins from 6,080 feet. Enjoy your picnic lunch here amid the sweeping desert panoramas before heading out of the park to Arches National Park, about half an hour away.

Three hundred million years of erosion created Arches National Park’s dramatic arches, precarious rock precipices, and towering sandstone spires. And while you can’t see it all in a day, you can cover a lot of ground. Arrive after two p.m. to avoid parking problems and crowded trails, and stop at the visitor’s center for an orientation before venturing inside. 

Since your time is limited, take a driving tour on the Arches Scenic Drive to see thousands of natural rock arches, ranging from a few feet to a 306-foot Landscape Arch.

The Windows Section is a favorite area when you’re short on time thanks to its large concentration of arches like North Window, Turret, and Double that are viewable from the road. But the hike to Utah license plate iconic Delicate Arch is worthwhile if you have the time and energy for the miles. 

People of every fitness level attempt the Delicate Arch Trail, but it’s no cakewalk and requires a 480-foot climb up steep, exposed slickrock. This makes sunset an ideal time to hike — for the temperatures and the views! See a pioneer-era cabin and Native American petroglyphs along the way before reaching this 52-foot-tall freestanding natural arch — arguably the most famous in the world. Don’t expect a solo selfie though, as crowds around the arch are always abundant. (And don’t forget your headlamp for the trip back down!)

Head straight from the trail to Moab Brewery for a beer and a plate of Johnny’s IPA Beer Can Chicken. Or opt to ditch your hiking boots once and for all and dress up for fine Southwestern cuisine at Desert Bistro to close out your trip!

Day 9 Summary

A view of Corona Arch in the background along Bowtie Arch Trail near Moab, Utah
A view of Corona Arch in the background along Bowtie Arch Trail near Moab, Utah. Photo Credit

Day 10: Moab to Salt Lake City

  • Today, you’ll take a quick sunrise hike, and then drive from Moab back to Salt Lake City for your flight home.
  • Drive Time: 3.5 hours to Salt Lake City

It’s time to say goodbye to Moab, but before you go, squeeze in one last hike on the Corona Arch Trail. It’s beyond the borders of Arches National Park, but it’s my favorite Moab arch!

With a massive 110-foot opening, sunrise views through the arch are especially striking. Although it’s just three miles roundtrip, ascending requires adventurous climbs up ladders and cables bolted to rocks on this slickrock trail … so make sure you get some coffee first.

Hike under the arch or just appreciate the view of Corona from a distance. Fun fact: A giant rope swing was once rigged off this massive sandstone arch, but the practice is now banned. 

When you’ve enjoyed your last desert sunrise, head back into charming Moab for breakfast and (more) coffee at Moab Garage Co. Then, load up your podcasts and hit the road again!

While the drive from Moab to Salt Lake City is only 3.5 hours, you can break it up with a stop in Green River for lunch at Tamarisk. Try to get a table next to the window so you can watch the river, and order the Navajo fry bread and a cinnamon roll – it’s your last lunch here, so you might as well do it big.

And now, sadly, your Utah National Parks road trip has come to an end. It’s time to wave goodbye to the painted desert, red rocks, and otherworldly landscapes of Utah!

  • Fly out of Salt Lake City: If you flew, head to Salt Lake City International Airport for your flight home.
  • Drive home from Moab: If you live close enough to Utah to drive home, you can end your road trip in Moab and drive back to your home state. You’re not far from the border of Colorado to the east, or if you’ll be heading back west to where you started near Las Vegas, why not make a detour south through Arizona and see the Grand Canyon? You know, casually.

Day 10 Summary

Girl in Arches National Park Utah
This. is a cute photo, but hiking in Arches National Park wearing slides and an empty backpack is not a great idea. Here’s what to pack for your Utah Mighty 5 road trip!

What to Pack for a Utah Road Trip

Here are a few tips to help you pack for your Utah National Park road trip. With varied elevations and climates, a diverse lineup of items is important for keeping you comfortable in changing weather. 

  • Bathing suit & towel: National parks like Zion have swimming holes and rivers where you can take a plunge to cool off on hot summer days. Pack a swimsuit and swim leggings to be ready for anything. (Psst: we’ve got a whole guide to the best swimsuits for curvy women.) And don’t forget to bring a lightweight, quick-drying travel towel, too!
  • Rain Jacket: Rain is rare in the summer, but rain and snow are possible, even in the desert, during the rest of the year. And when it pours in the desert, it can quickly turn into a torrential flood. Bring along a lightweight umbella and a packable rain jacket to ensure you’re prepared for anything. We like this one for men and this for women.
  • Warm jacket: Even in the summer, the desert can get very cold at night. Plus, there’s a huge difference in elevation and temperature from Zion National Park to Bryce Canyon National Park. We love packable down jackets because they stow small and take away the chill on cold nights. Here’s the same one for men.
  • Hiking clothes: We love these high-tech hiking pants (men’s version). They’re rugged and comfortable, plus cute enough for apres-hiking activities!
  • Comfy shoes: We recommend hiking in lightweight trail runners (for women and men) designed to handle the miles and keep your feet cool on hot days. For more details, head over to our posts on the best shoes for men and for women.
  • Portable charger: National park road trips mean nonstop GPS mapping and selfie-snapping. Even if you have a wall charger, you’ll want an Otterbox car charger. It charges your phone fast thanks to the USB-C port and car outlet. 
  • Camera: Sure, modern smartphones take great photos, but if you’re traversing Zion’s Narrows or going on an epic hike, you may want an upgrade. We love GoPro cameras for wide-angle shots, water adventures, and voice-activated selfies. 
  • Hiking daypack: You could hike with an old-school Jansport backpack, but the miles will be far more comfortable with a Camelback Hydration Pack. It’s designed to sit comfortably on your hips and shoulders, and you’ll have plenty of water so you you can stay hydratd!
  • Headlamp: It’s better to be safe than sorry when hiking close to sunset or before sunrise. Stash a headlamp in your hiking bag!
Sparse grass and vegetation in the foreground with hoodoos and canyons in the background at Arches National Park in Utah
Hoodoos are scattered over the Utah landscape, and we can’t help but think they all look incredibly phallic. But like, right?! Or are we just incredibly immature? (Photo Credit)

Utah National Parks Road Trip Map

We’ve created a map of this Utah Might 5 road trip! Save it for offline use so you don’t get lost in the desert when your GPS cuts out (likely, tbh). And be sure to bookmark this page to refer back to while you’re planning!

We’ve also created a free, printable version of this itinerary! Plus, we’ll also send you our favorite tips to help you plan your Utah road trip. Just sign up below.

About Our Contributing Writer: Jenny Willden is a Utah native obsessed with exploring the Beehive State’s national parks, mountains, and trails. When she’s not editing Utah’s Outdoor Sports Guide or California’s Sensi magazines, you’ll find her traveling the world in search of tacos to eat and puppies to pet.


Are you ready to hit the road and see Utah’s Mighty Five? Which park are you most excited about visiting? Did we convince you to study up on Mormon history?? Tell us in the comments below!

Psst: Planning more National Park Trips? We have lots of other posts on our favorite US National Parks:

xo Lia & Jeremy signature graphic

FOLLOW US!

Psst: Planning to do this itinerary? Save this post for later on Pinterest!

Our Top Travel Tips & Resources

Here are our favorite travel tips & resources for saving money and planning travel logistics! For more tips, check out our complete guide to trip planning.

  • Booking Flights: To score flight deals, search on Skyscanner or Kayak. Money-saving tips: fly mid-week or on the weekend; fly carry-on only on a budget airline; and take red-eyes or early morning flights.
  • Accommodations: We usually stay in budget-friendly, vacation rentals, boutique hotels or private rooms in hostels. We use Booking.com to book hotels (we love their flexible cancellation policy) and Hostelworld to book hostels (low deposit, easy change/cancellation, and excellent reviews). For vacation rentals, we prefer to book using VRBO (they’ve got lower fees and better support than Airbnb, and we’re not fans of Airbnb’s unethical track record.) You can also book vacation rentals on Expedia and Hotels.com. We’ve also used TrustedHousesitters as both hosts (for our home and our fur-child) and travelers!
  • Travel Insurance: We always, always, ALWAYS buy travel insurance for international trips, and we STRONGLY suggest it – visit our Travel Insurance Guide to find out why. We recommend either World Nomads or SafetyWing for international travel insurance. SafetyWing is one of the few policies that covers Covid-19, and they have excellent monthly policies that are perfect for Digital Nomads and long term travelers!
  • Vaccines & Meds: We use the travel guides on the CDC website to research recommended medications and vaccines for international trips. We always recommend getting every vaccine recommended by the CDC! You can get them at your primary care doctor’s office or a walk-in pharmacy.
  • Tours: We love booking guided tours, especially food tours and walking tours, to get a local’s perspective and a history lesson while sight-seeing! We book our tours using Viator and GetYourGuide.
  • Transportation: We use Rome2Rio to figure out how to get from place to place using public transit. When we book a rental car, we use Kayak to compare rental companies and find the best deal.
  • Luggage Storage: Whenever we’re checking out early or taking advantage of a long layover, we use Stasher or LuggageHero to safely store our luggage while we’re running around. On Stasher, you can use the code PW10 for 10% off your booking!
  • What to Pack: Here are the travel essentials that we bring on every trip. We also have packing lists for hot weather, cold weather, and many more. Take a look at all of our packing guides!

How to Prepare for a Fun Trip on the Lake | Top World Travels

A trip to a lake is always a fun time, but it takes a little preparation to make it into something truly special. When you carefully plan out fun activities, great food, and safety you can make your trips to the lake even better than ever before. Here are a few tips to make your next lake trip something really amazing.

Plan Some Activities

When you are planning your lake trip it’s a good idea to have a variety of activities on the schedule. Think about planning for activities on the shore, in the water, and out on the boat. This will help everyone have a good time no matter where they are. Sports like volleyball can be a lot of fun near the lake, as can beach ball and even card games. In the water, you can play various things like Marco Polo or have contests and races. Bringing water skis, wakeboards, and tubes can make your time on the boat fun and exciting for people of all skill levels.

Understand Boating Safety

Even on the best days on the lake, there is some potential for danger. That’s why it’s important that you put safety first every time you plan a boating trip. According to Easton & Easton, all boats should have emergency equipment, including lifejackets, fire extinguishers, and a radio. Make sure the passengers on the boat are wearing their lifejackets, and that they practice safe behaviors. Safety is important on the boat but also when you’re playing in the water or even on the sand. Remembering to wear sunscreen is an important part of safety anytime you’re out in the sun.

Plan a Great Menu

Lots of snacking options are essential for a great time at the lake. According to Workweek Lunch, as you plan out your menu, you should make sure to think of lots of finger foods people can easily eat in between activities. It’s a good idea to have a balance of sweet and savory options so that everyone can stay nourished. Make sure to pack some healthy choices like vegetables and dip to keep people satisfied. It’s also a good idea to check for any dietary issues so that you don’t face a problem with an allergy or intolerance.

Your trip to the lake should be a lot of fun, especially if you put a little effort into planning. You don’t need to plan it all by yourself though, so make sure to delegate responsibility so you don’t get overwhelmed. With help from all of your friends, you can make your trip to the lake something to remember.

Read this next: What You Should Do Before Taking Your Boat Out on the Water